
Wind Turbine Day 4
|

|
|
Day 4
More searching on the internet in the evening to pick up any tips etc & I’m ready to remove the stainless steel bowl inside the plastic drum. Prise off the plastic ring around the top circumference & the metal bowl should come out. Be careful not to damage the motor end when doing this. I put the unit on the ground with the motor at the top & rocked it to & fro until the stainless steel drum came loose, then I put it on its side & pulled it out, keep the plastic spacer that fits onto the spline as it may be useful later. I was not sure about the next bit but tried turning the plastic nut thing on top the motor to release the motor cover. This nut thing was plastic & I didn’t want to break it so I used an oil filter removal tool, the strap kind, normal anti clockwise rotation was fine. It actually wasn’t very tight so maybe I could have just used a 16mm socket although the 5/8 socket seemed to be a better fit. Update, I used a 5/8 socket on the second washing machine & it was fine. So, I’ve got the cover off, now for my first look at the inside of this motor, wow, loads of windings & it looked in very good condition. Next I removed the 4 bolts holding the motor, 3/8 socket was best. Update, when I took the motor cover off of the second motor I noticed several cracks in the plastic, I remember this was mentioned on the internet & the general consensus was that these cracks are caused by the huge torque & spin of the washing machine but would be ok when used at the slower speed of a wind turbine, I hope so, plus this is the bit (stator) that doesn’t spin so it shouldn't cause a problem.. Keep the unit rotated so the motor is at the top, you don’t want it falling off at this stage. There is a large metal washer on both sides of the motor, keep these as they may come in handy. Now I need to remove the shaft, undo the large nut at the motor end & the shaft will pull out, put the drum on it’s side so the shaft doesn’t fall out onto the floor. The nut is not tight, my first one was hand tight & the second one I used a spanner but had to refit the motor cover to stop the whole thing from going around, all straight forward. Now for removing the shaft bearing that is embedded in the plastic drum, um….., this could be tricky, cup of coffee & a bit of a think. An 80mm hole cutter would get it out but it would have to be a deep one plus I don’t have one that size, so with a jigsaw I cut the flimsy top part of the drum off & then used the jigsaw to cut the bearing out, cutting from both sides. Although the hole cutter would have been ideal the jigsaw method seem to work ok, I stayed about 5mm away from the fixing holes & to be honest it was looking fairy good. However I’m not sure how to finally mount this so I may still have to make further alterations, it’s time to see if I can find any info on the net on how others mounted it, I have a few ideas involving angled plate or simply using large U bolts but with a bit of thought I should be able to come up with a better solution. |
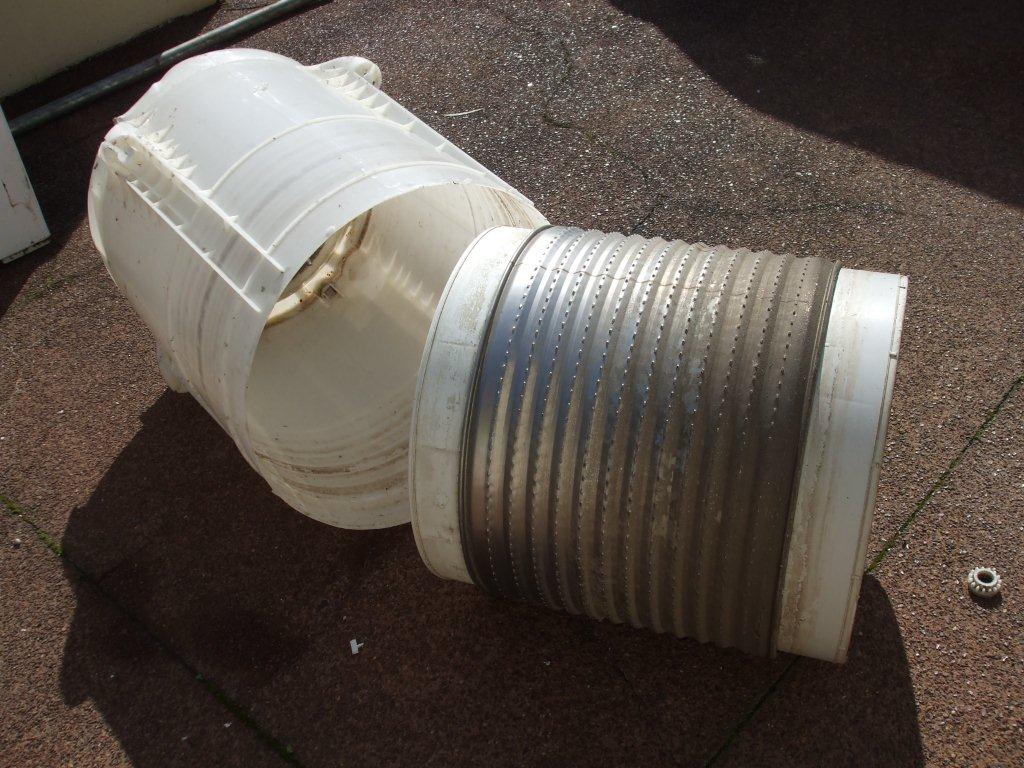
Removing the metal bowl.
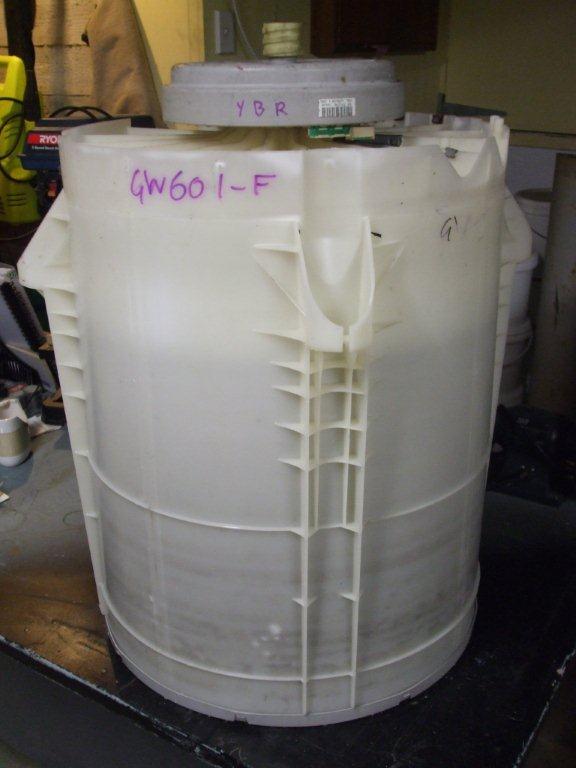
The inside of the washing machine pictured upside down showing the motor on the top plus the plastic nut thingy on the very top.
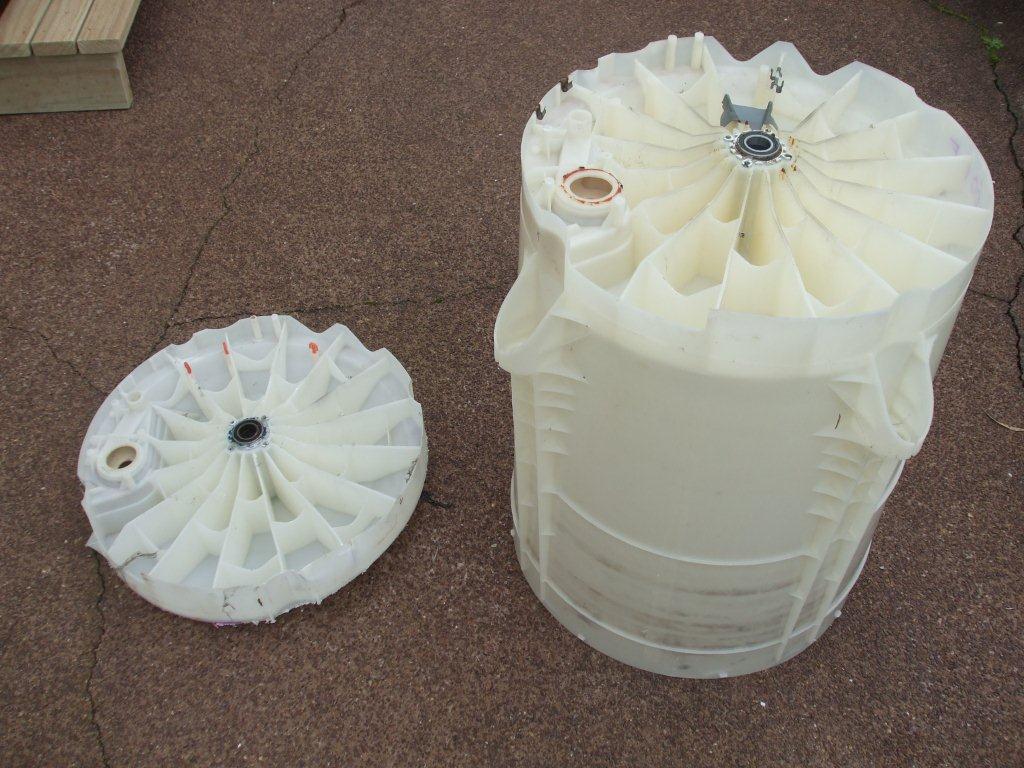
Same as above but with the motor removed, next to it on the left is the top that I sliced off my second washing machine with the jigsaw.
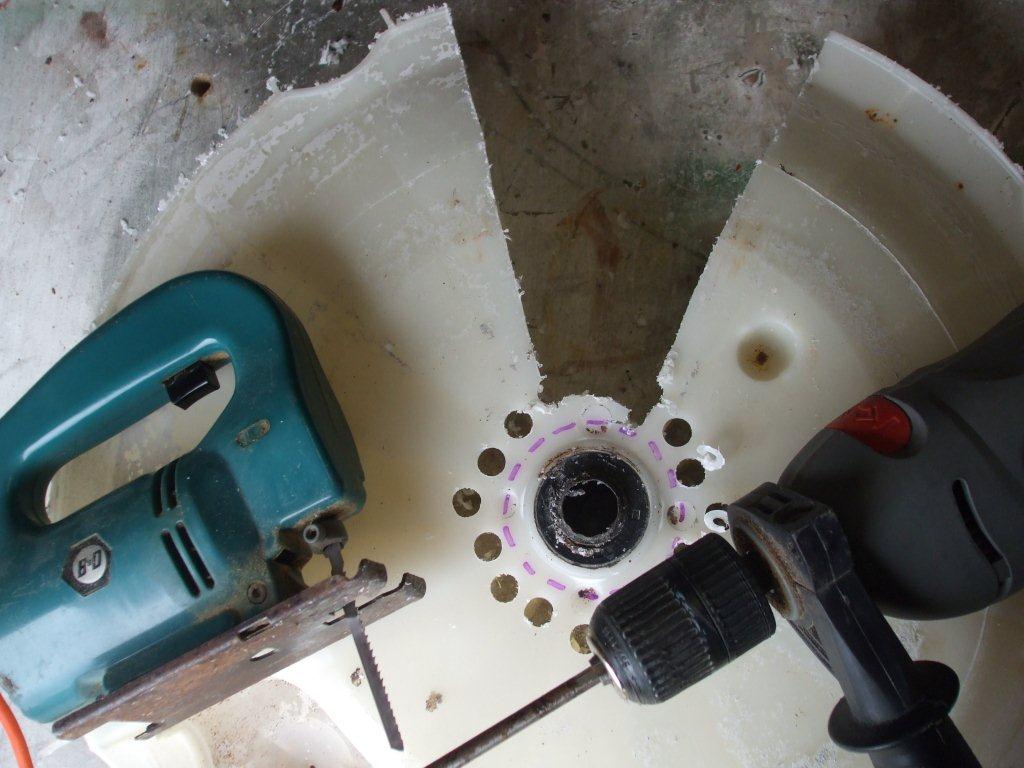
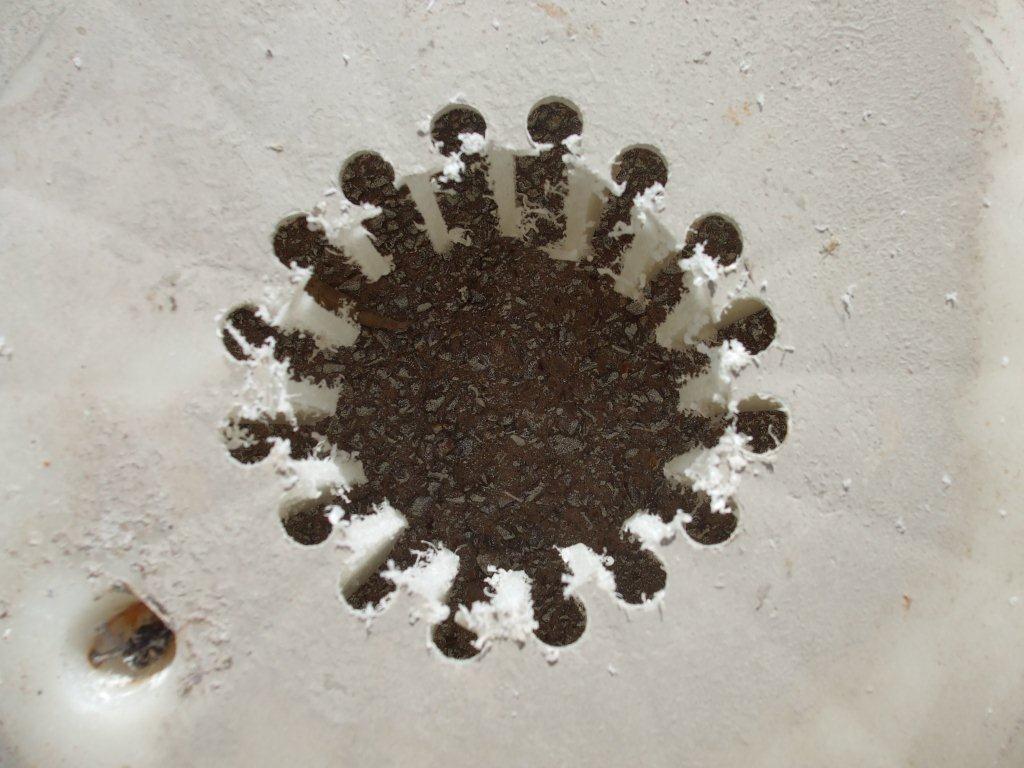
Initial 'V' shape cut made with the jigsaw to try & access the bearing housing in the middle.
Showing the holes I made with a flat bit to help jigsaw the bearing housing out.
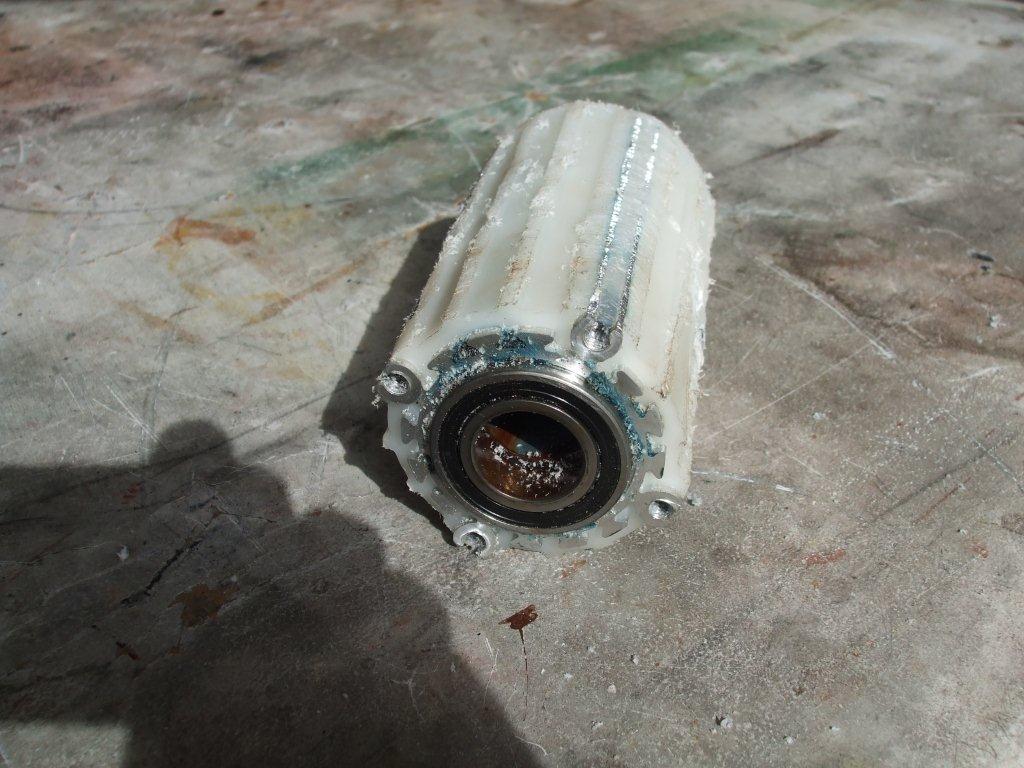
Finally, I got the bearing housing, I used the jigsaw again to tidy up the plastic outside covering.
|
If you like our site then please click on the Facebook icon at the top right of this page, thank you.
For more information you can email us via our Contact Us page.