
The Solar Hot Water Project
|

|
I have a mains pressure 180 litre cylinder with a connection at the top for the hot water output and a connection at the bottom for the incoming cold mains water. The water is heated by an electrical element, sometimes called an immersion heater, this has it's own thermostat & works well but it costs a small fortune to run.
I would say that this is a typical setup, especially for New Zealand.
So the first problem is how to connect our 2 solar hot water pipes to this old cylinder.
The answer is surprisingly easy but hard to explain so I'm going to add a few pics to help out.
I would say that this is a typical setup, especially for New Zealand.
So the first problem is how to connect our 2 solar hot water pipes to this old cylinder.
The answer is surprisingly easy but hard to explain so I'm going to add a few pics to help out.
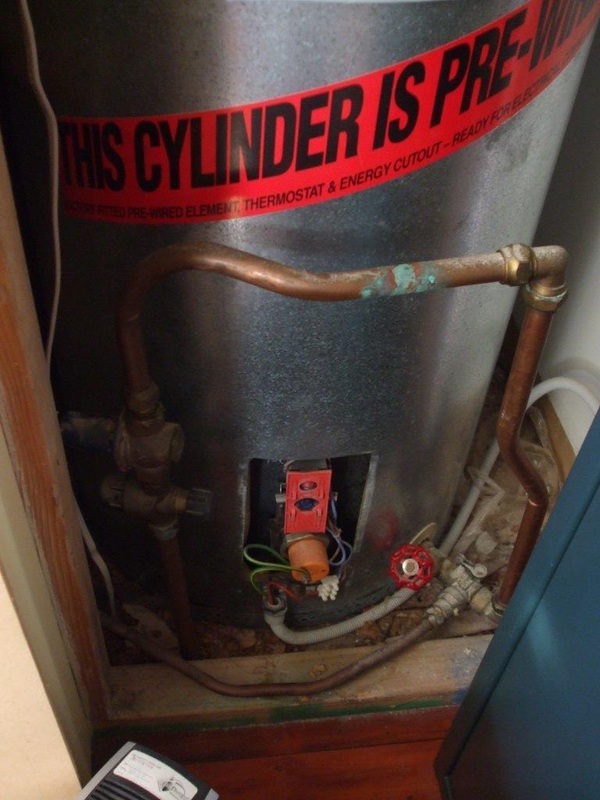
Before the install.
The mains water comes up on the left, goes across & goes down to the cylinder on the right. Just before it goes into the cylinder it goes through a cold water expansion valve which has a small 15mm drain pipe coming out of it & then through the stop valve with the red handle.
Before the solar install.
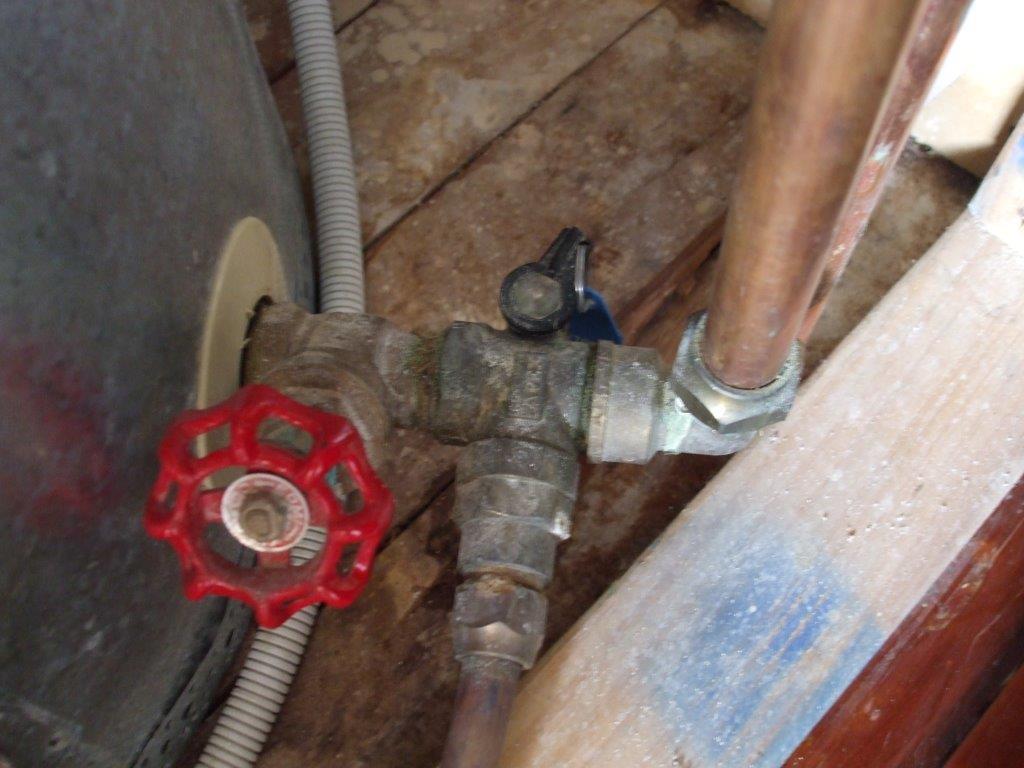
A close up of how the mains cold water used to enter the cylinder.
|
After the install.
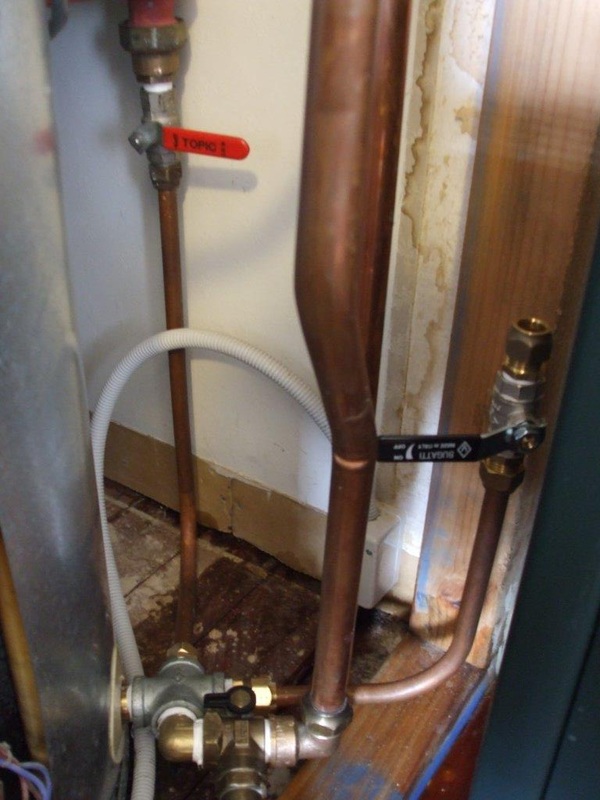
The stop tap is removed & a 4 port silver coloured thing is installed & the cold water is connected to that. There are 2 other smaller 15mm copper pipes coming out of that 4 port thing, they are our 2 solar hot water pipes, one is capped off for now with an isolating valve & the other goes to our pump which is again capped off with an isolating valve. This is a good stage to get to because you can fill & turn everything back on & it will all work as it did before until you are ready to run the pipes to the roof.
Another view of the new solar install, if you compare it with the pic on the left then you can see how it was installed.
|
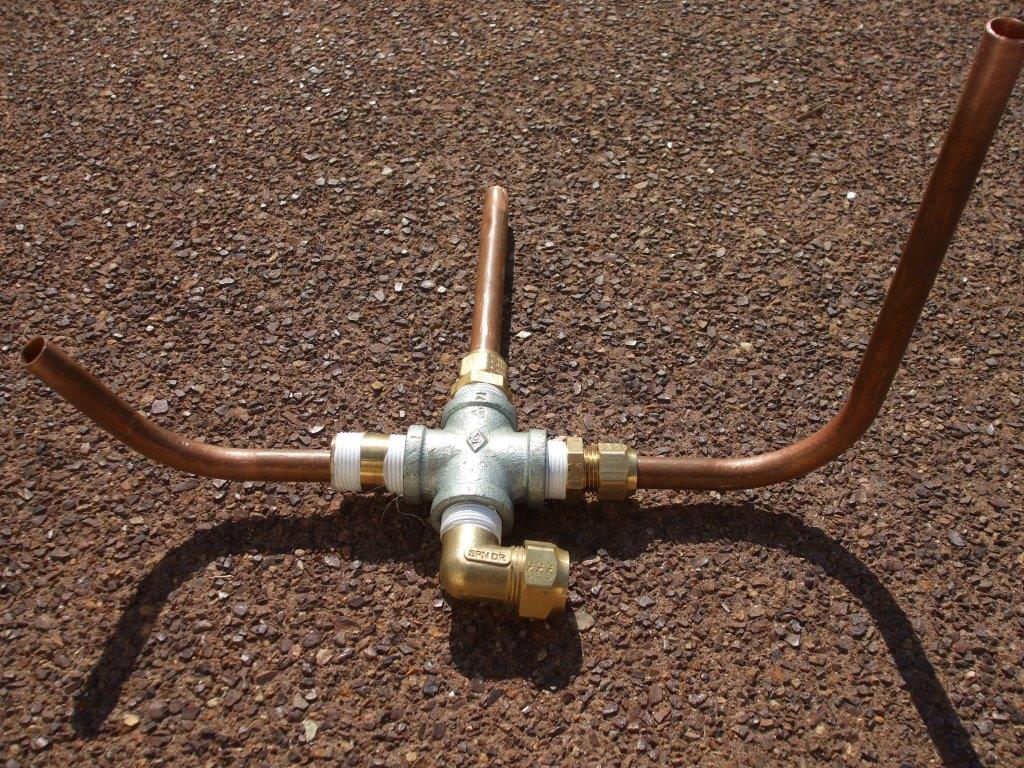
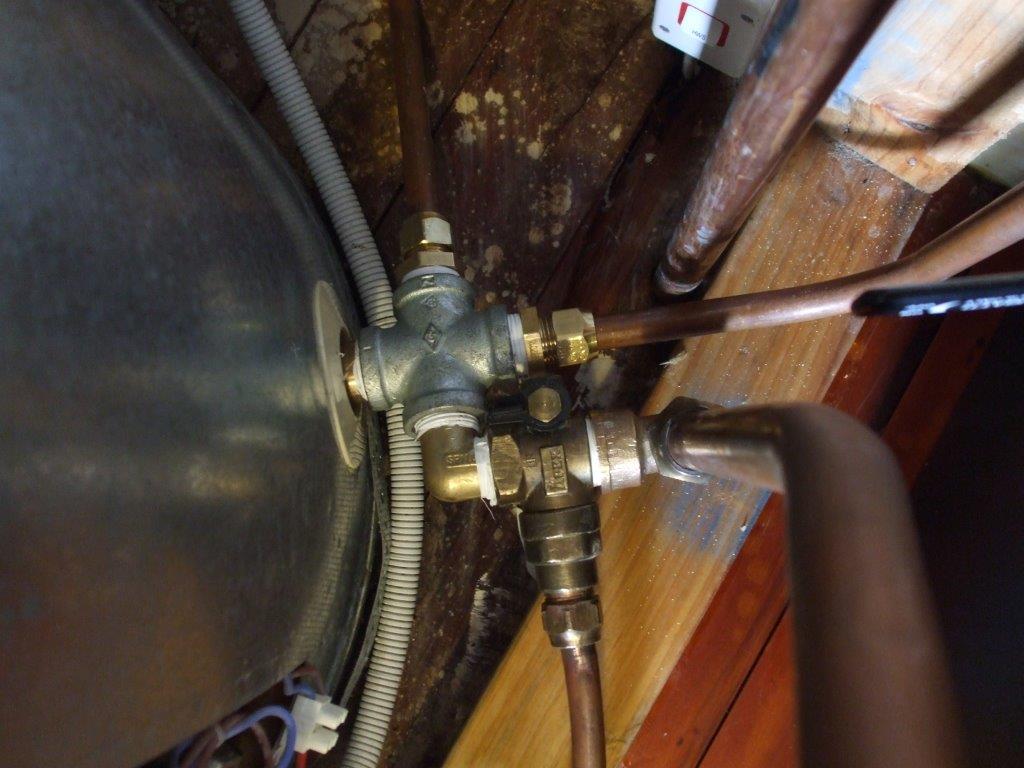
Here is that 4 port valve, in the same orientation as it was fitted above. All 4 ports of the valve are 20mm, but 2 of them have 20-15mm reducers fitted & it is only the nearest one that remains at 20mm for the mains water connection & the left hand one for the cylinder connection. The main thing with this is that the 15mm pipe on the right goes all the way through the 4 port valve & out the 20mm cylinder connection side on the left & into the cylinder where it has been slightly bent upwards. So the left port is 20mm but the copper pipe is 15mm, this is how we can get the extra connection to the cylinder by only using the one hole.
The 4 port valve above is actually called a 4 port solar conversion transfer valve, you can buy one especially made for this job or you can buy the parts above & make your own which would save at least $100. I made the one above for around $30 without the pipe.
When I made mine I had to insert the pipe through the 4 port valve before I bent both ends. The copper pipe end that goes into the cylinder is for bringing the hot solar water down from the roof, it is bent upwards so that it deposits the hot water slightly higher than the much colder water at the bottom of the cylinder. But be careful how long & at what angle you use as it could hit the electrical element inside the cylinder.
All the connections into the port & into the cylinder will need PTFE tape (the white stuff in the pic above) to be wound onto the threads to stop leaks, I generally put approx 12 turns of tape onto each joint in such a way that it doesn't want to unravel when you screw the fitting in. When connecting the copper pipes to the brass fittings you will need to add an olive underneath the brass nut as well as adding a little plumbers putty around both sides of the olive. I've added a picture below left to show the olive between the fitting & the nut (called a crox nut). It is possible to use a tool to create a ridge in the copper pipe & use this ridge instead of an olive, the tool is called a crox tool & if you have one then you probably know how to use it but olives are cheap & good for beginners.
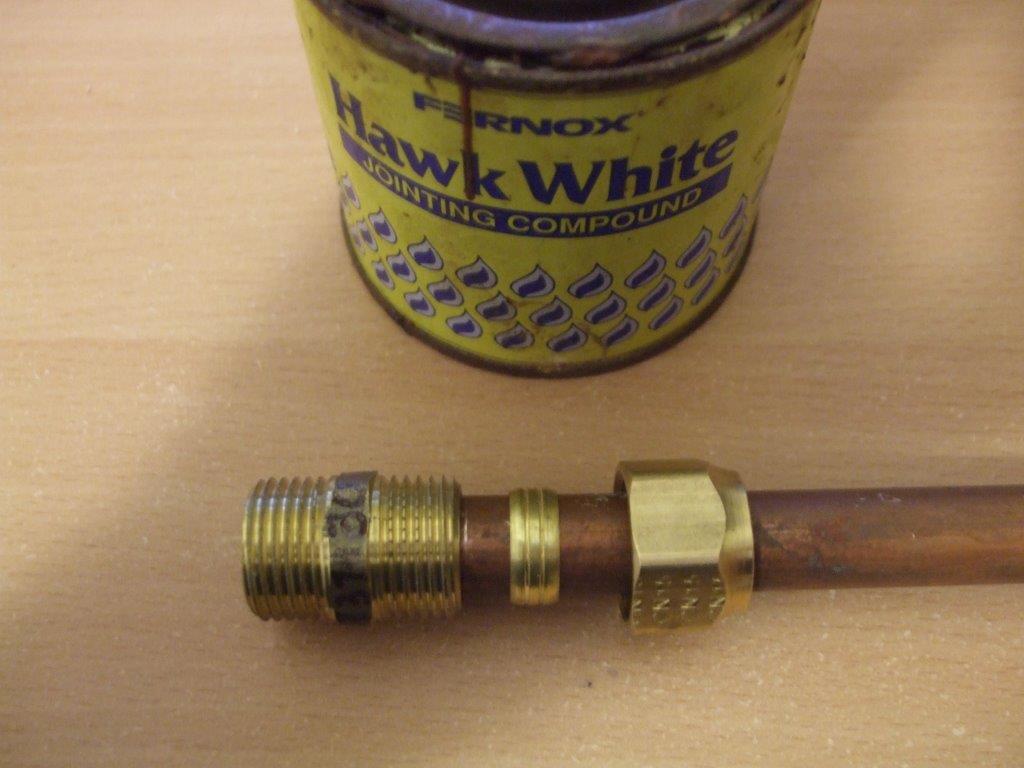
Here's that olive I mentioned earlier, when the nut is screwed on it compresses the olive onto the pipe to make a leak free join. These type of fittings are called compression fittings. Always use a little plumbers paste on both sides of the olive to help the seal.
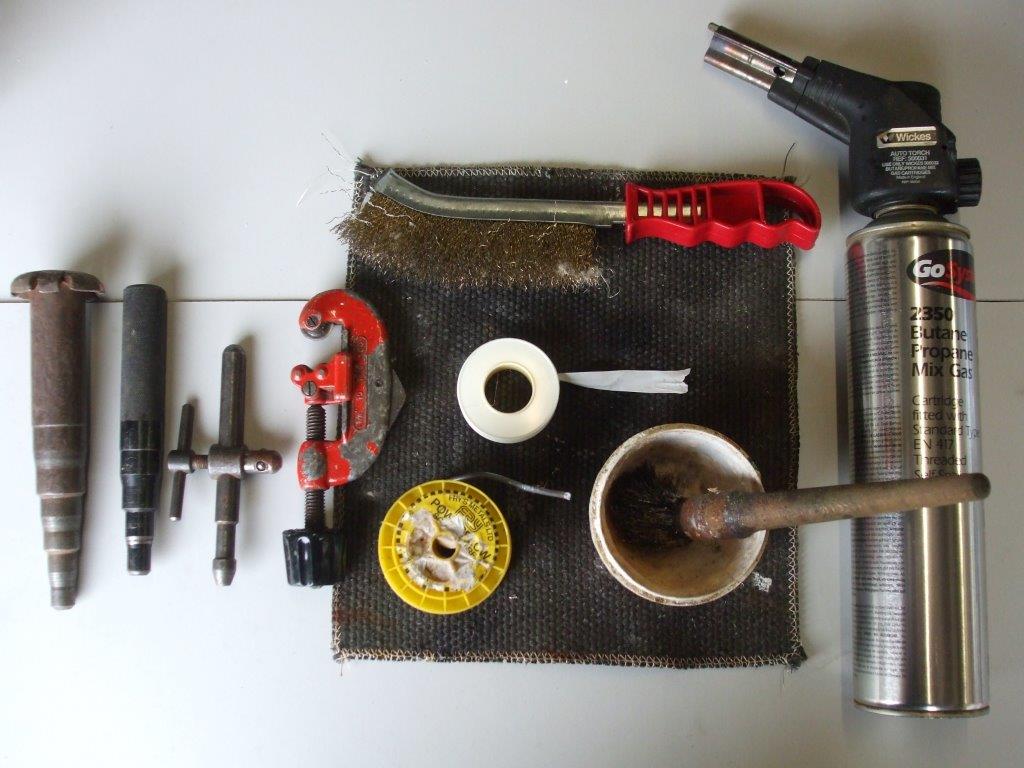
Here are a few tools you may need, the 2 tools on the left are hammered into the end of copper pipe to expand them. That way you can join 2 pipes of the same size together without buying another fitting, it's not worth buying them for this project but if you already have them or you can borrow them then definitely use them. There's also a roll of white PTFE tape along with some solder & a pot of flux that I tend to brush onto the joints. There is also a red pipe cutter, these are cheap so definitely get one. The wire brush is also handy for cleaning up the thread of old fittings. I've also added my blow torch, I like this one because it's small & portable. And lastly is the soldering mat, I always call it an asbestos mat but I know it's not asbestos, but it is very useful.
There are of course many other tools that you will need such as spanners etc but I just wanted to show you some of the plumbing specific items.
|
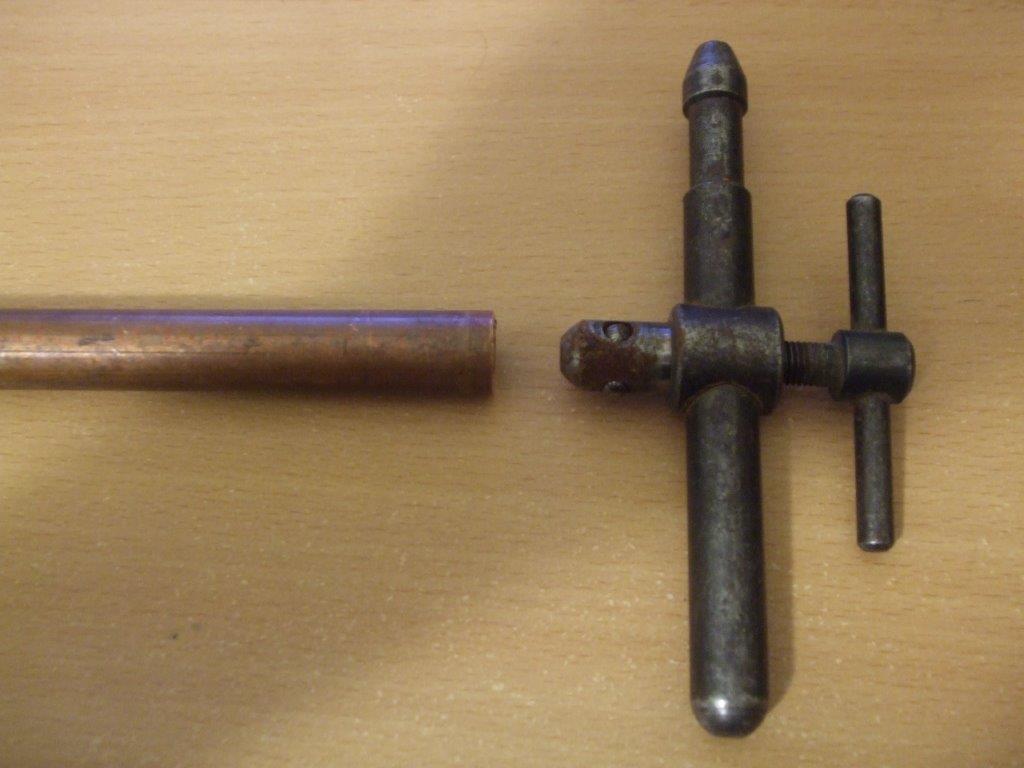
Here's a picture of the crox tool for 15mm copper pipe.
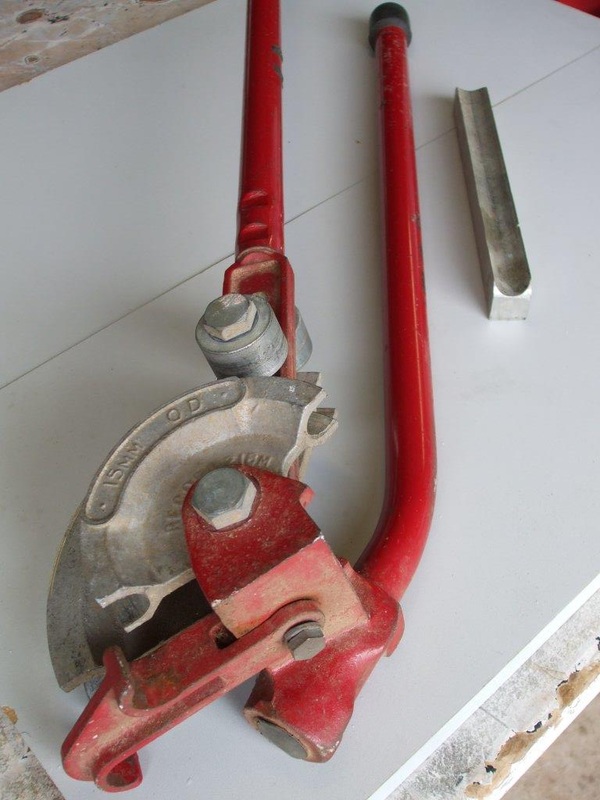
This is a pipe bender, there are many different types, this one will bend 15 or 20mm copper pipe. It saves a lot of time and money, you can do this project without one but you would have to buy extra fittings to create the bends. If you don't have one borrow one or use those online auctions again.
|
One last thing to mention is that if you touch old fittings or valves in any way then they may leak afterwards, it's just something you have to get used to when plumbing. You will probably use some sort of valve to turn the cold water off & another valve to drain your cylinder & you may also loosen or remove the hot water output pipe at the top of the cylinder to allow air inside the cylinder when draining it. All or some of these valves or joints may leak afterwards, just be prepared for this & start the work in the morning to give yourself time to fix or replace them. Never leave a connection with a leak, it doesn't matter how small the leak is it must be fixed, that one small drip now will cause floor boards to rot later. I almost forgot, do I really need to mention that you have to turn your electrical heating element off before you drain the cylinder, probably not but don't forget.
If you like our site then please click on the Facebook icon at the top right of this page, thank you.
For more information you can email us via our Contact Us page.