
The Solar Hot Water Project
|

|
I don't want to go into too much detail here as the design will depend on the materials that are used, my design is definitely based around some old commercial greenhouse frames and 2 commercial stainless steel kitchen work tops.
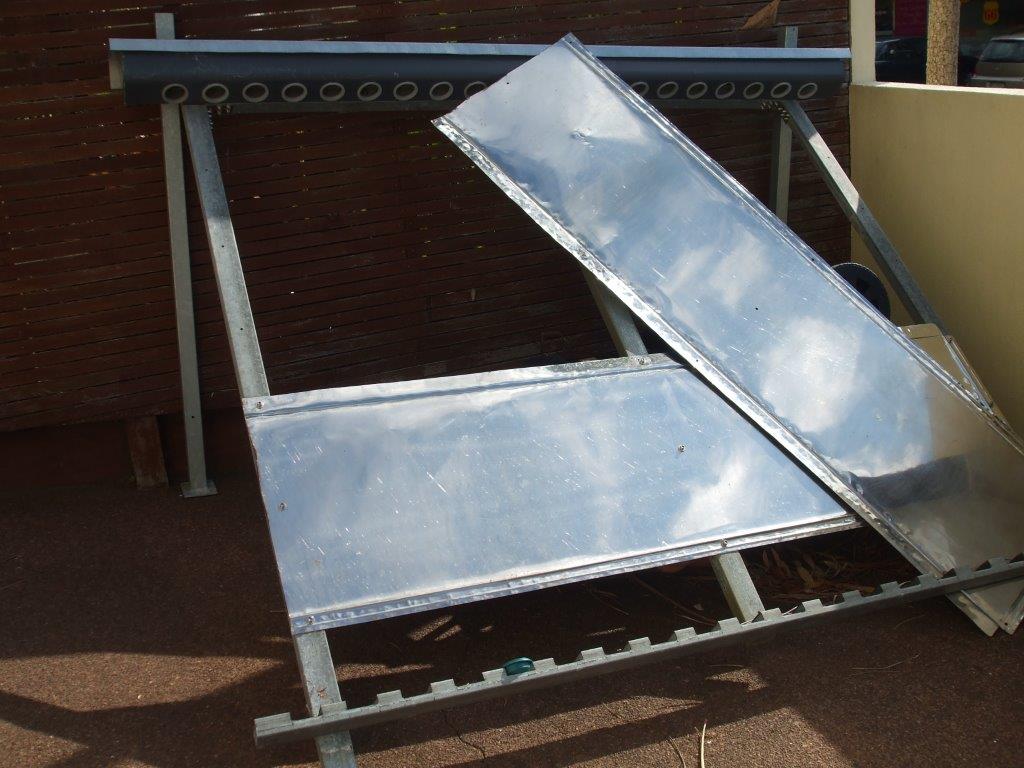
One of the stainless panels has been unscrewed to make it easier to work on the manifold at the top.
I've tapped & screwed the entire frame together, it would have been much easier to weld it but I like the idea that I can dismantle it & easily take it up to the roof in pieces. I used some stainless steel brackets to help join some of the frame together. All the fixings are stainless steel, with the majority being M5 tapped & screwed especially when using the brackets as shown below. The 3 angled uprights are secured to the horizontal lower rail by one M8 bolt in each.
The whole frame is very light, I can lift it on my own, it's just an awkward shape to move on your own.
When the second stainless steel sheet is fixed in place there will be a gap between the sheets similar to the gap between the lower sheet & the bottom rail. There will also be a gap between the top sheet & the top manifold box. This is so the wind can dissipate through the frame, I suspect without the gaps that it would act as a big sail & put far too much stress on the roof. This is obviously not a problem if you are mounting it flat on a pitched roof. The stainless steel sheets should reflect the sun that comes between the tubes back onto the back of the tubes which should improve the heat output considerably.
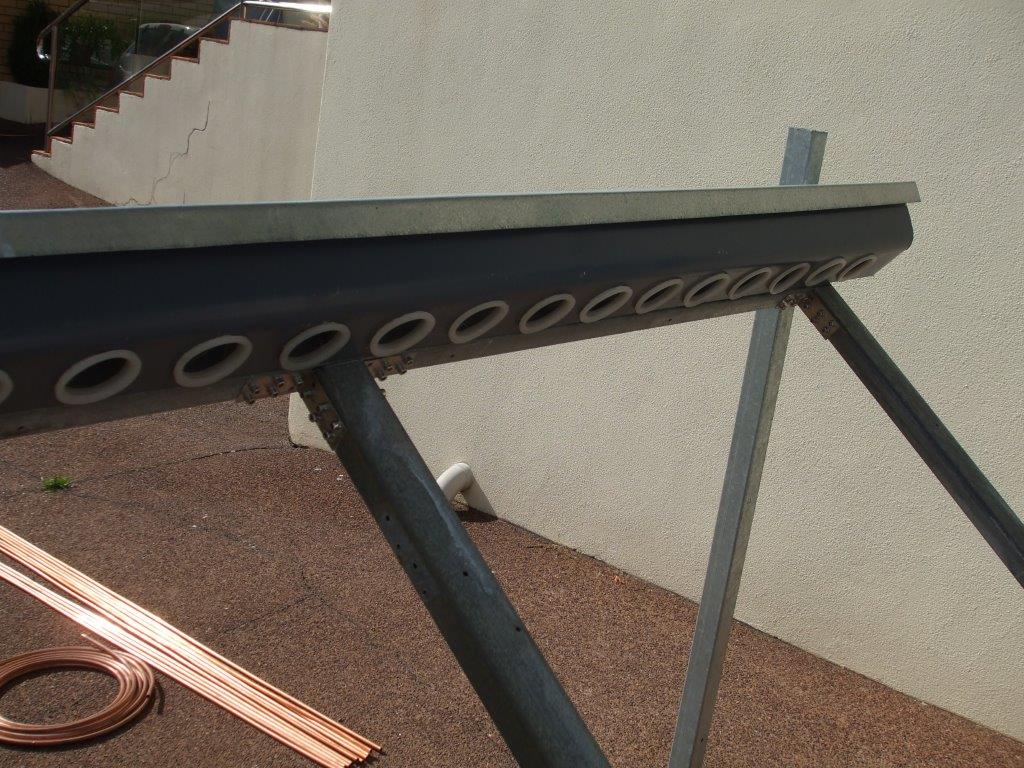
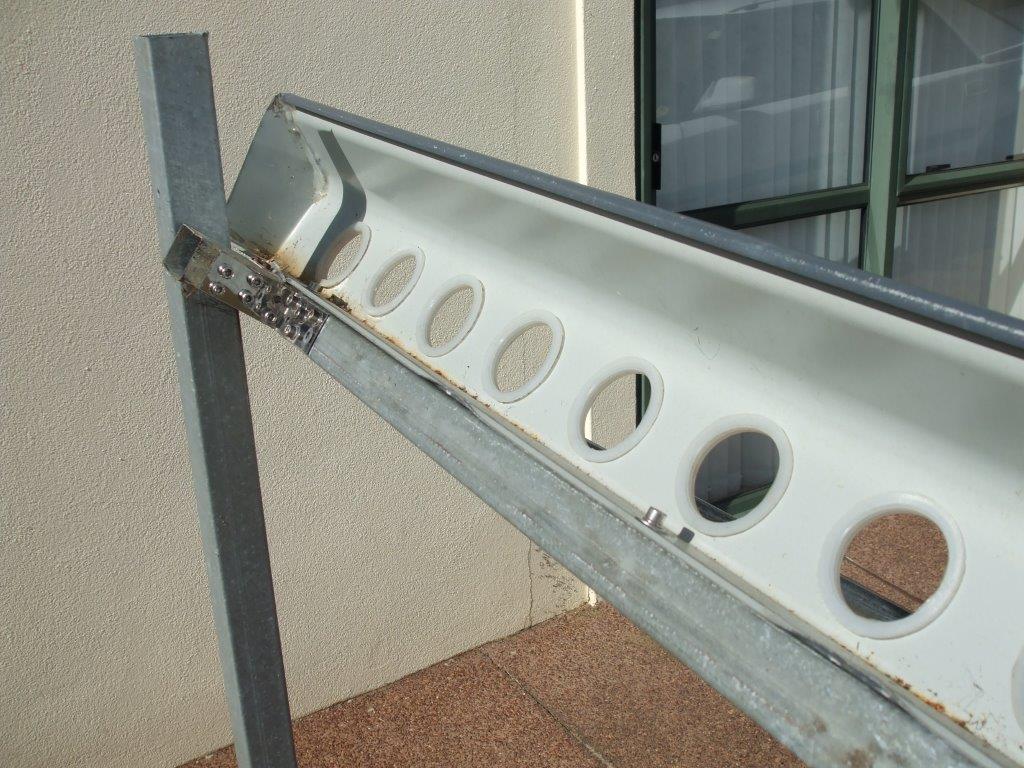
Showing the bolt & bracket method of securing the top of the uprights. I designed it this way because it provided a fairly large flat area to mount the manifold box to. The maifold box (the bit with the holes in) is 2340mm long. The angled uprights are 2045mm long. The length of the legs will depend on the angle to the sun in your area.
The stainless steel brackets cost $10 for 40 of them from an online auction, what a bargain.
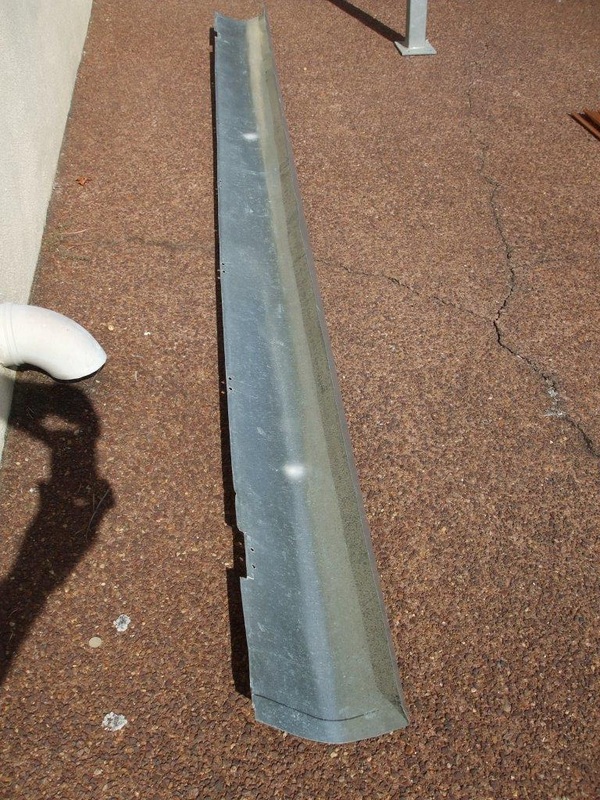
I used a flat piece of galvanised sheet from the scrap dealer for $5 and bent it over the side of my workbench to create a lid for the manifold box. I made a couple of notches to fit 2 hinges so the lid can be opened to fit or remove the evacuated tubes.
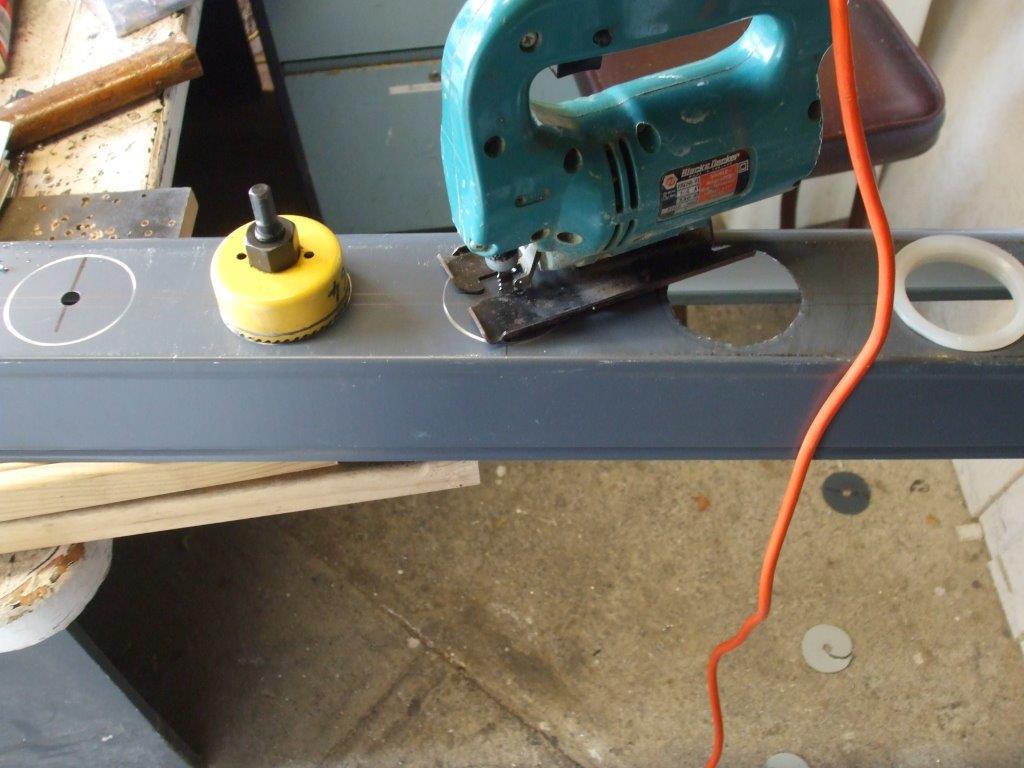
I tried various hole saws but using the jigsaw was definitely the quickest and easiest method. I ended up using the hole saw to just mark the holes. The holes are 64mm in diameter. The gap between holes is 45mm (109mm between centers). The overall length of this box is 2340mm.
|
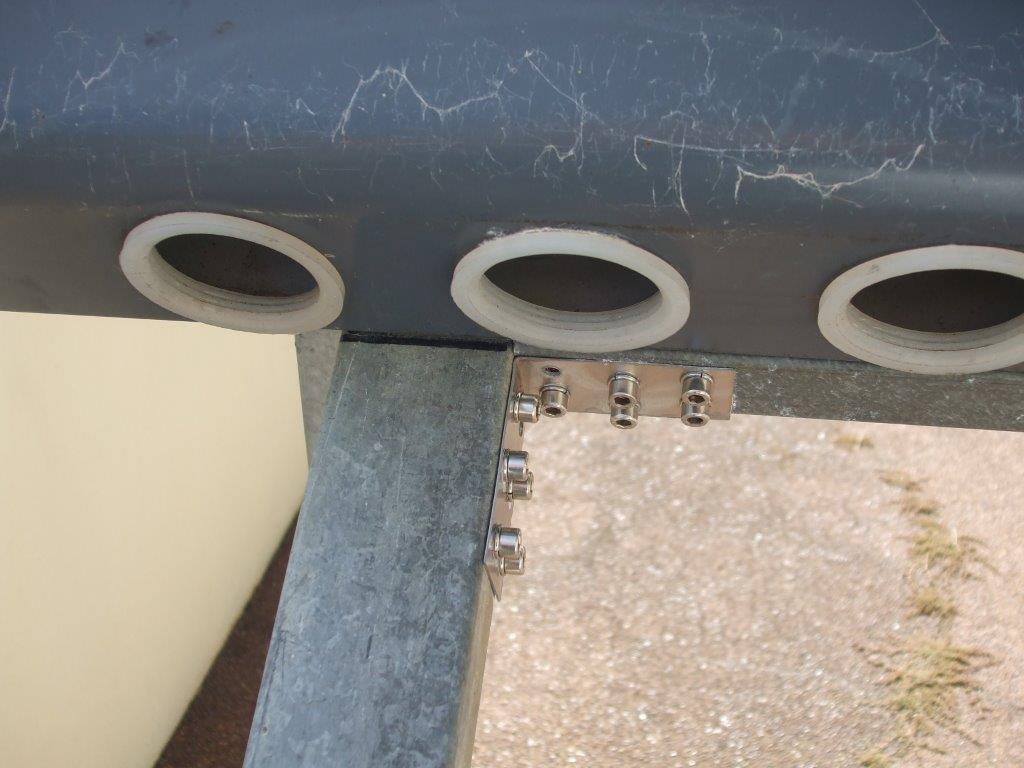
Showing the M8 bolt securing each upright rail to the lower rail. The lower rail is 2270mm long.
The top of the tubes when inserted will end approx 10mm above the silicone grommets. When finished a copper manifold will sit inside this box.
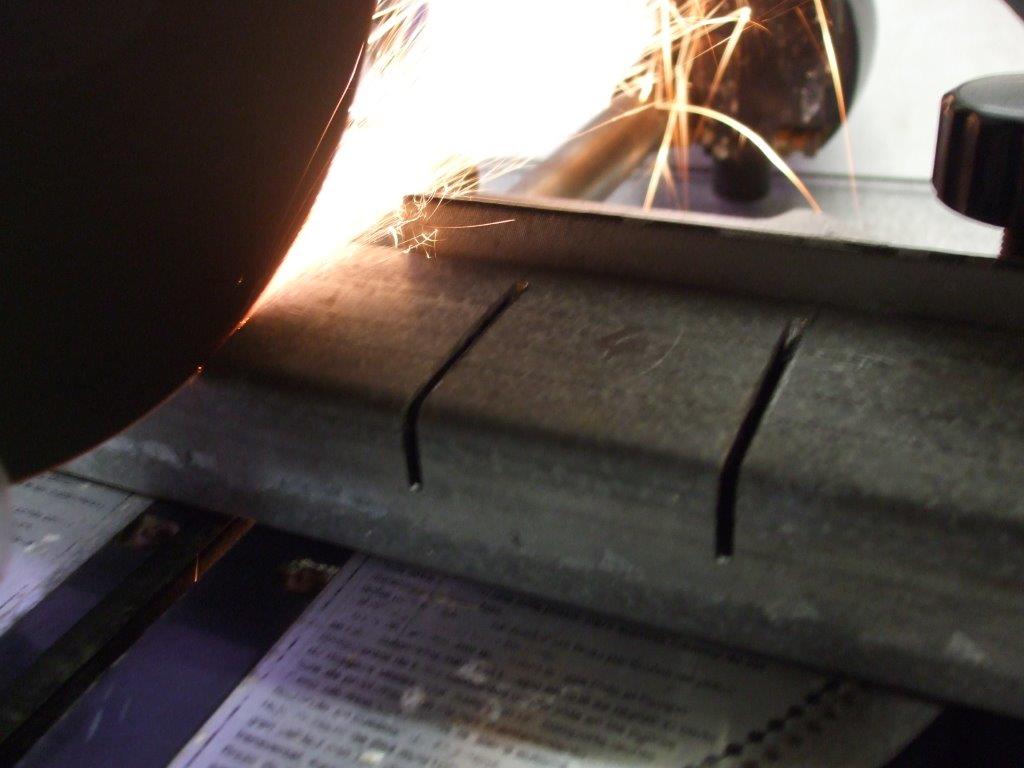
I put a metal cutting disc in an old drop down saw normally used for wood. This can be done with most saws but you will need to look out for any plastic bits such as plastic guards or they may get damaged with the heat. Mine had a plastic guard and it was fine but I was only doing one cut at a time. It was able to do most of the cutting especially on the lower rail but it couldn't cut everything. Gloves & goggles are a must for this job.
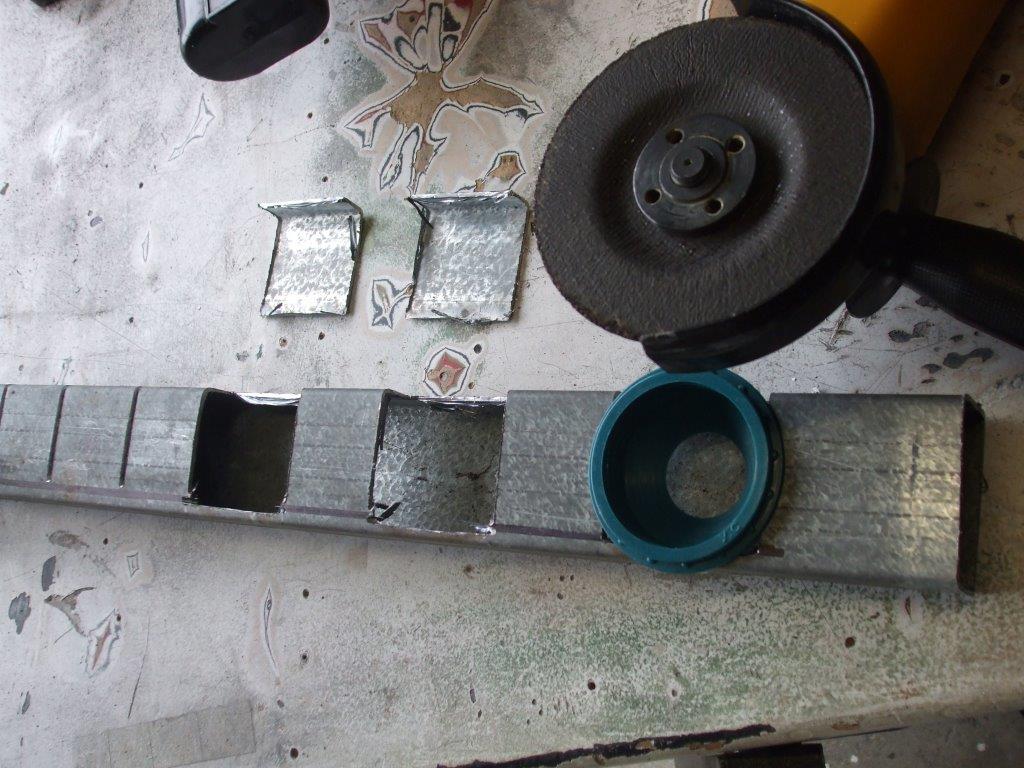
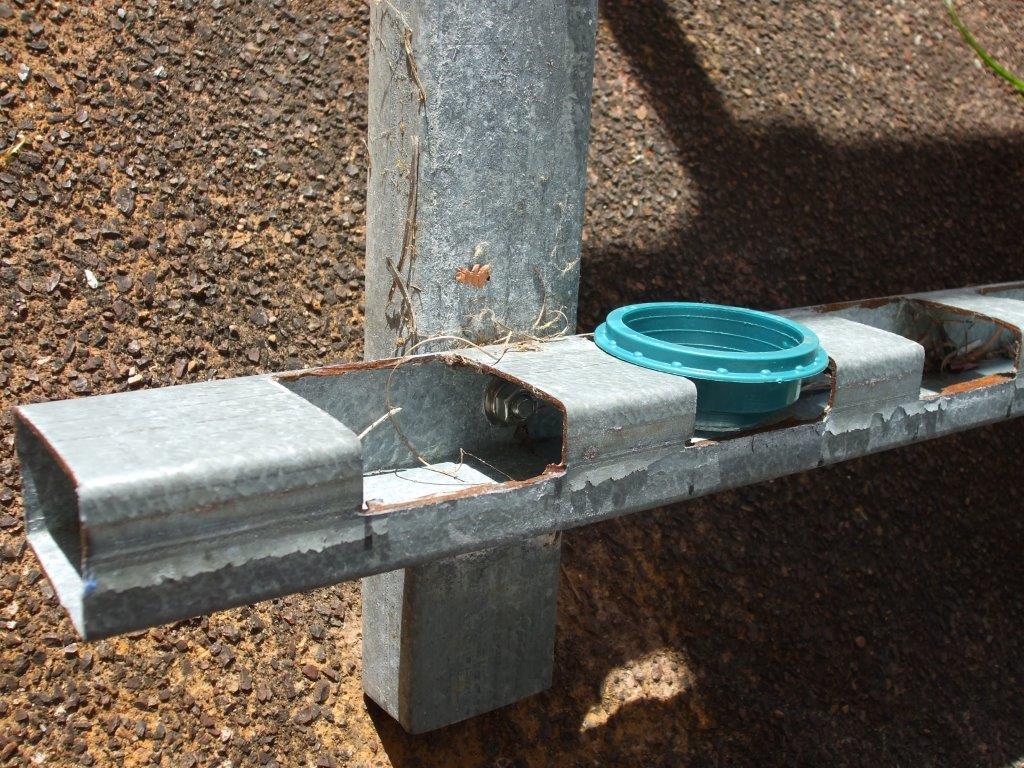
I used a grinder with a metal cutting disc to finish off the lower rail where the drop down saw couldn't go. Gloves & goggles time again. The width of the gap is 64mm which makes a nice tight fit for that green base plate thing. The distance between centers has to match the top which is 109mm between centers.
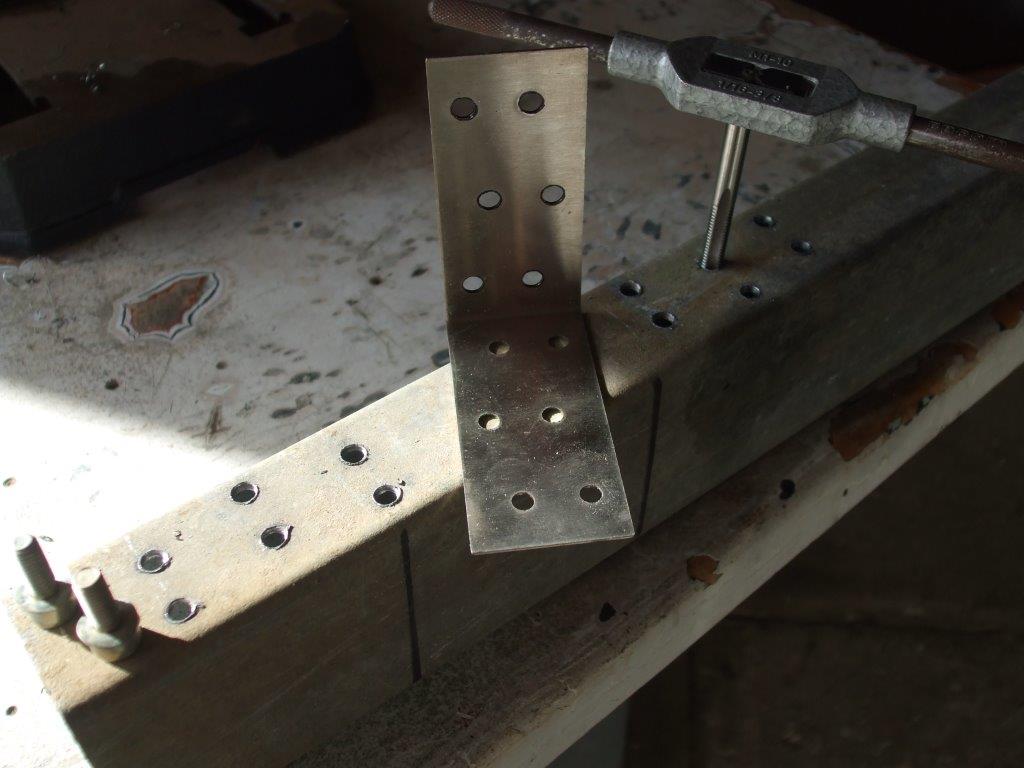
Lots of drilling & tapping, those brackets came with all those holes. It was overkill to use them all but I first used half the holes & there was still some flex in the frame so I ended up using 12 bolts per bracket, it certainly stiffened it up.
|
The hardest thing with making this frame was getting the correct material at a good price, again don't rush into buying new stuff, next time you drive pass a scrap dealer just pop in & see what he has. If you are willing to part with the money to buy all the materials new then I would suggest it would be cheaper to buy a complete frame along with the tubes & heat pipes from an online auction. But where's the fun in that.
If you like our site then please click on the Facebook icon at the top right of this page, thank you.
For more information you can email us via our Contact Us page.