Marks Supplies
  • Home
  • Spa Pool Steps
  • Hot Wire Cutter
    • 150mm Hot Wire Cutter
    • 480mm Hot Wire Cutter
    • 1300mm Hot Wire Cutter
    • Nichrome Wire and Hot Wire Cutter Parts
    • What size nichrome wire to use?
  • Modelling Supplies
    • Textured Terrain >
      • Textured Terrain Blends
      • Textured Terrain Basix
      • Textured Terrain Basing Grit
      • Textured Terrain Application
      • Textured Terrain Photos
    • Forest Foliage >
      • Forest Foliage Blends
      • Forest Foliage Basix
      • Forest Foliage Application
    • Lichen
  • Brother P-Touch labels
  • Cool Glasses
  • Garden Ornaments
  • PCs & Components
    • 8 Core Gaming PC
    • Ultimate 8 Core Gaming PC
    • Warframe Online Gaming
  • Miscellaneous Items For Sell
    • Motorola 2 Way radios
    • Sat Navs
    • Crimp Terminals
    • Washing Machine Parts
    • Help Us
    • Used Dell Servers
    • Used Hard To Find Computers And parts
    • Various Electrical Items
    • Various Non-Electrical items
  • Chess Boards & Pieces
  • Personalised Place Mats
  • The Wind Turbine Project
    • Wind Turbine Day 1
    • Wind Turbine Day 2
    • Wind Turbine Day 3
    • Wind Turbine Day 4
    • Wind Turbine Day 5
    • Wind Turbine Day 6
    • Wind Turbine Day 7
    • Wind Turbine Day 8
    • Wind Turbine Day 9
    • Wind Turbine Day 10
    • Wind Turbine Day 11
    • Wind Turbine Day 12
    • Wind Turbine Day 13
    • Wind Turbine Day 14
    • Wind Turbine Day 15
    • Wind Turbine Day 16
    • Wind Turbine Day 17
    • Wind Turbine Parts For Sale
  • The Fishing Kontiki Project
    • Building The Fishing Kontiki
    • Building The Winch
    • Fishing Kontiki Parts For Sale
  • The Sterling Engine Project
    • The Sterling Engine Build
    • The Sterling Engine Results
  • Project Segway
    • Self Balancing Scooter Day 1
    • Self Balancing Scooter Day 2
    • Self Balancing Scooter Day 3
    • Self Balancing Scooter Day 4
    • Self Balancing Scooter Day 5
    • Self Balancing Scooter Day 6
    • Self Balancing Scooter Day 7
    • Self Balancing Scooter Day 8
    • Self Balancing Scooter Day 9
    • Self Balancing Scooter Day 10
    • What Others Have Built
  • The Solar Hot Water Project
    • Solar Hot Water Day 1
    • Solar Hot Water Day 2
    • Solar Hot Water Day 3
    • Solar Hot Water Day 4
    • Solar Hot Water Day 5
    • Solar Hot Water Day 6
    • Solar Hot Water Day 7
    • Solar Hot Water Day 8
    • Solar Hot Water Day 9
    • Solar Hot Water Day 10
  • Robots & Electronics
    • Robot Technic ian Ultrasonic
    • What Others Have Built
    • Electrical - Electronic Parts for Sale
  • Future projects
  • Shipping & Other Info
  • Links
  • Contact Us

Wind Turbine Day 3

Picture
_ Day 3

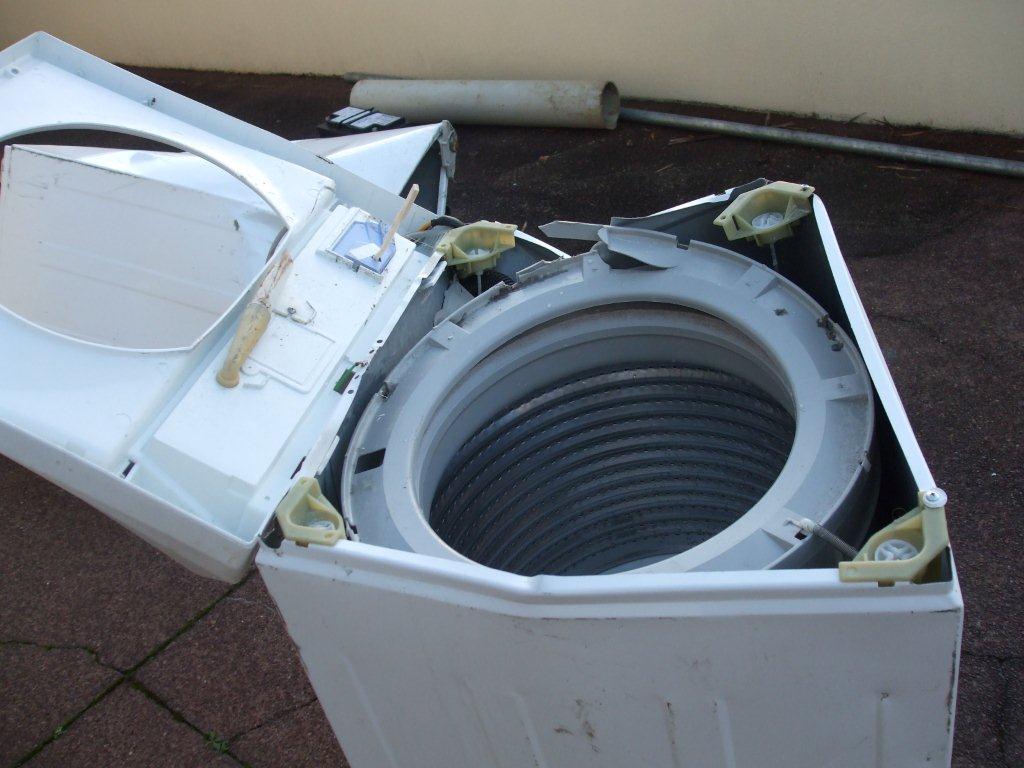
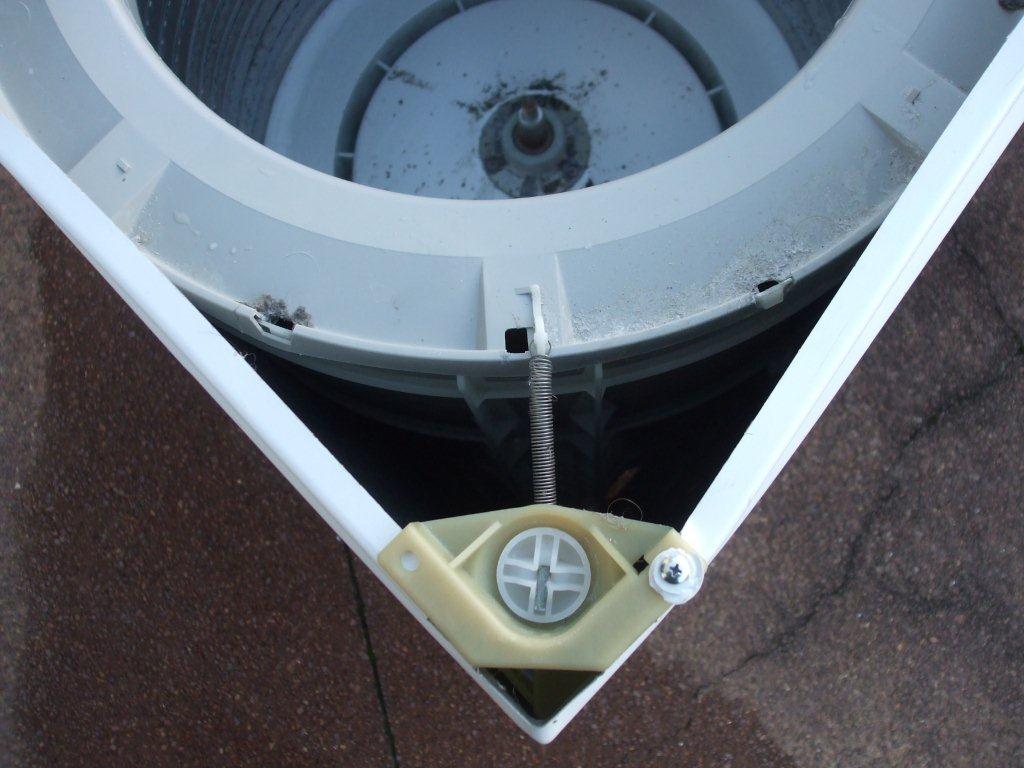
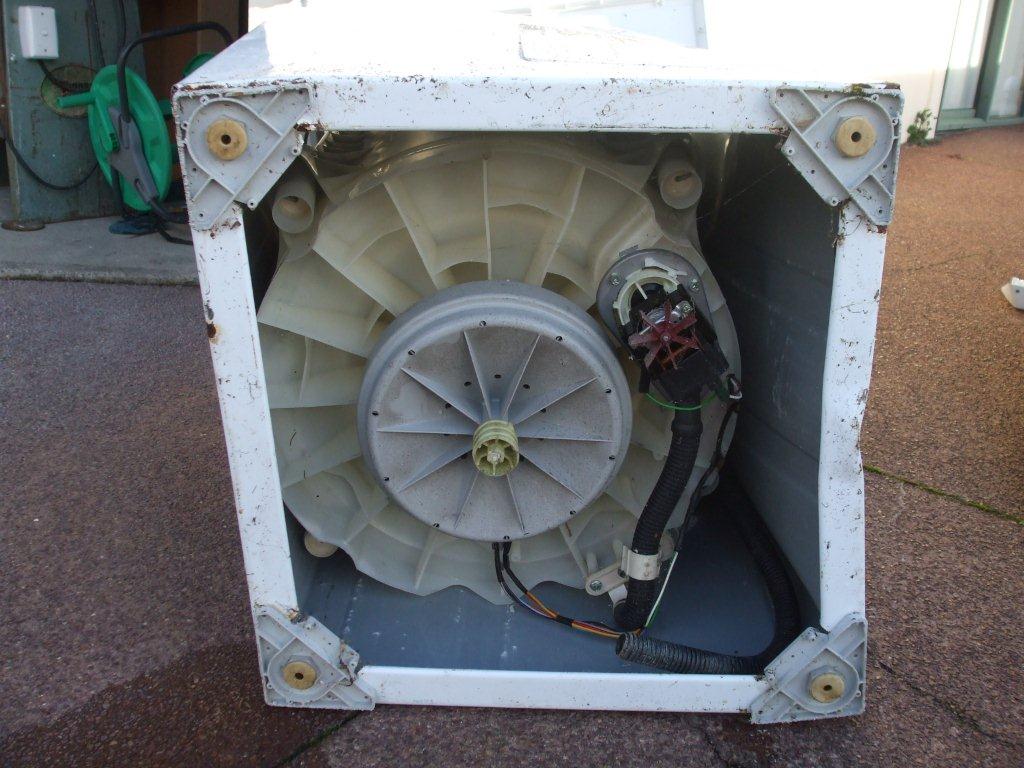
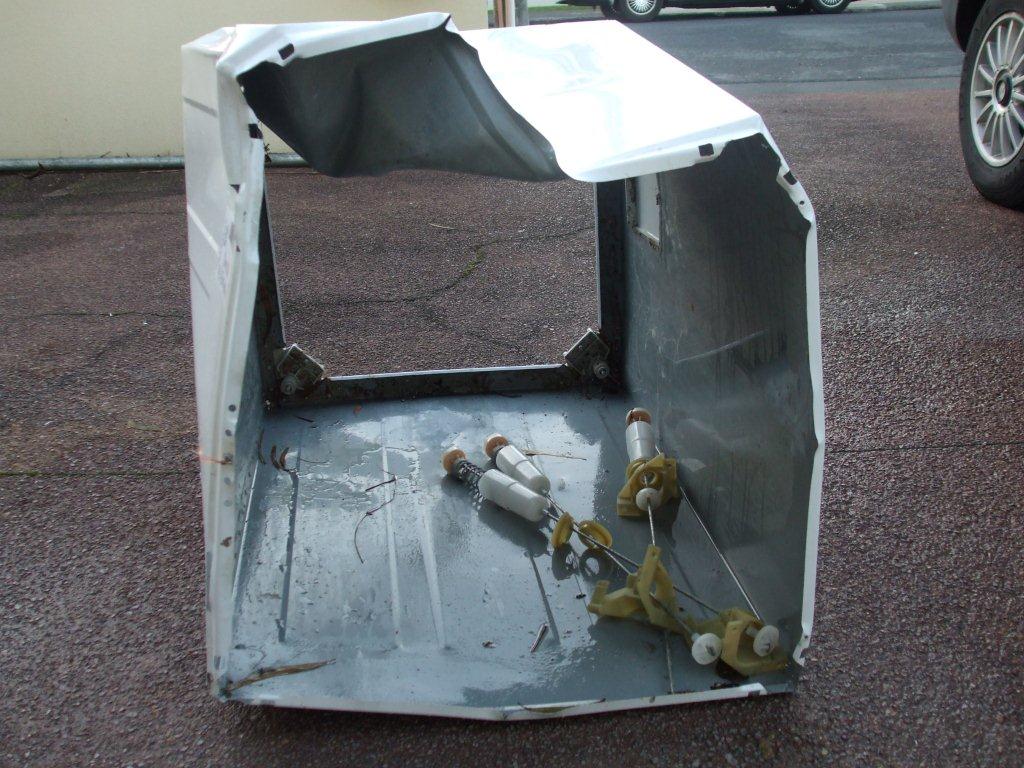
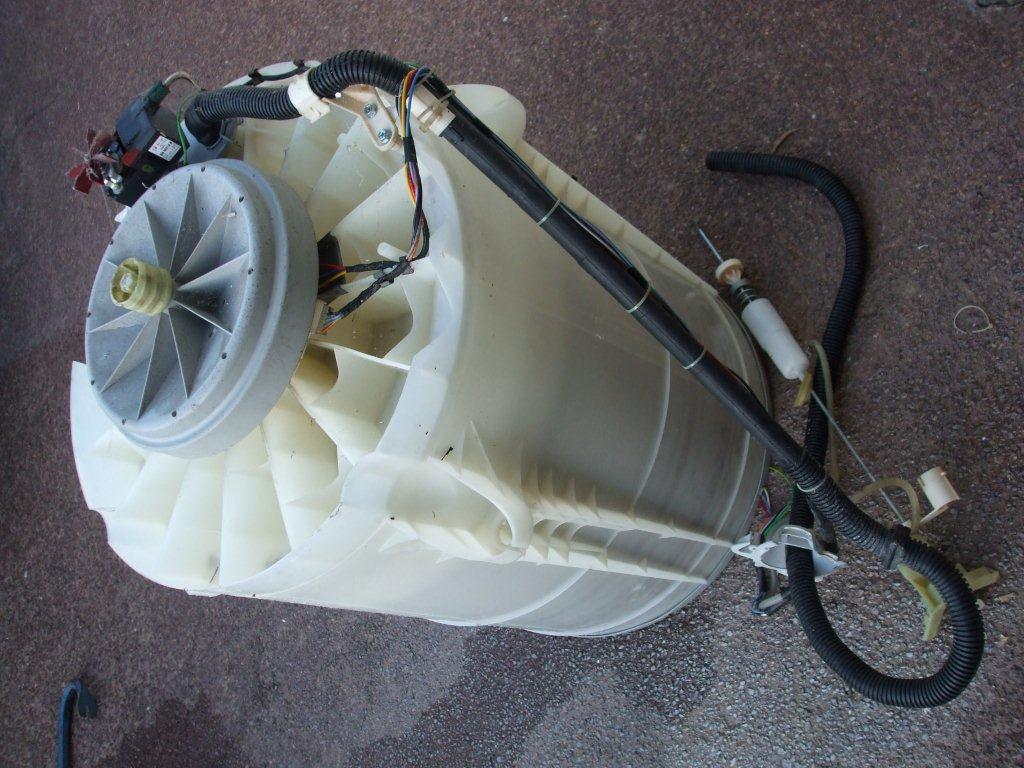
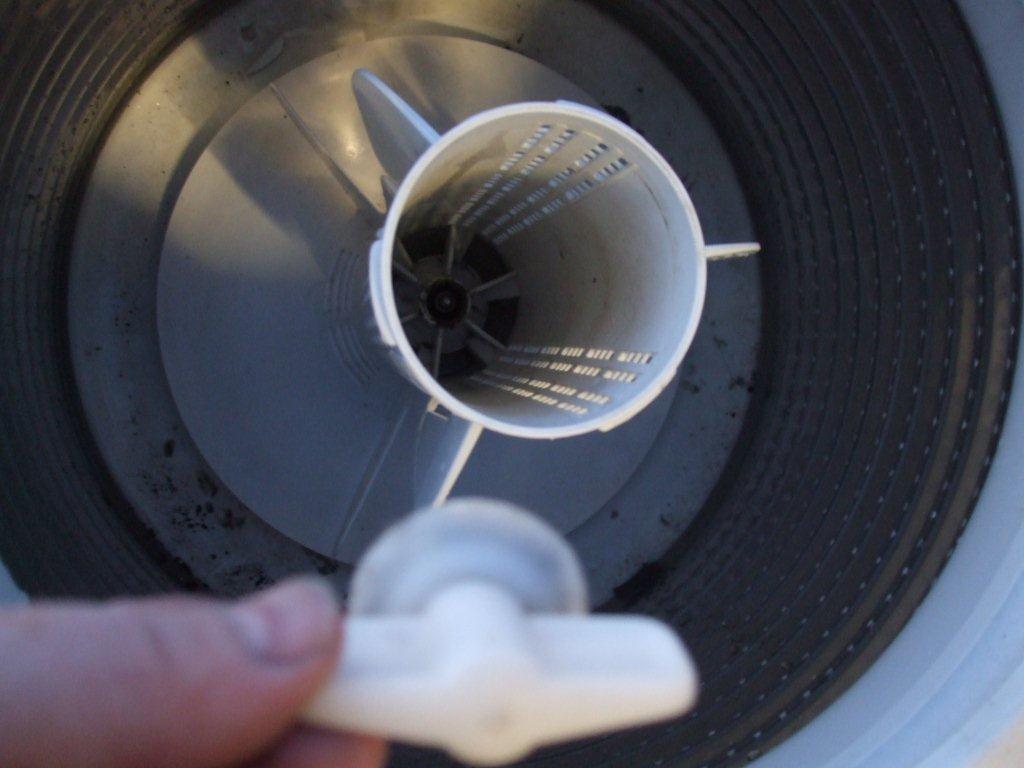
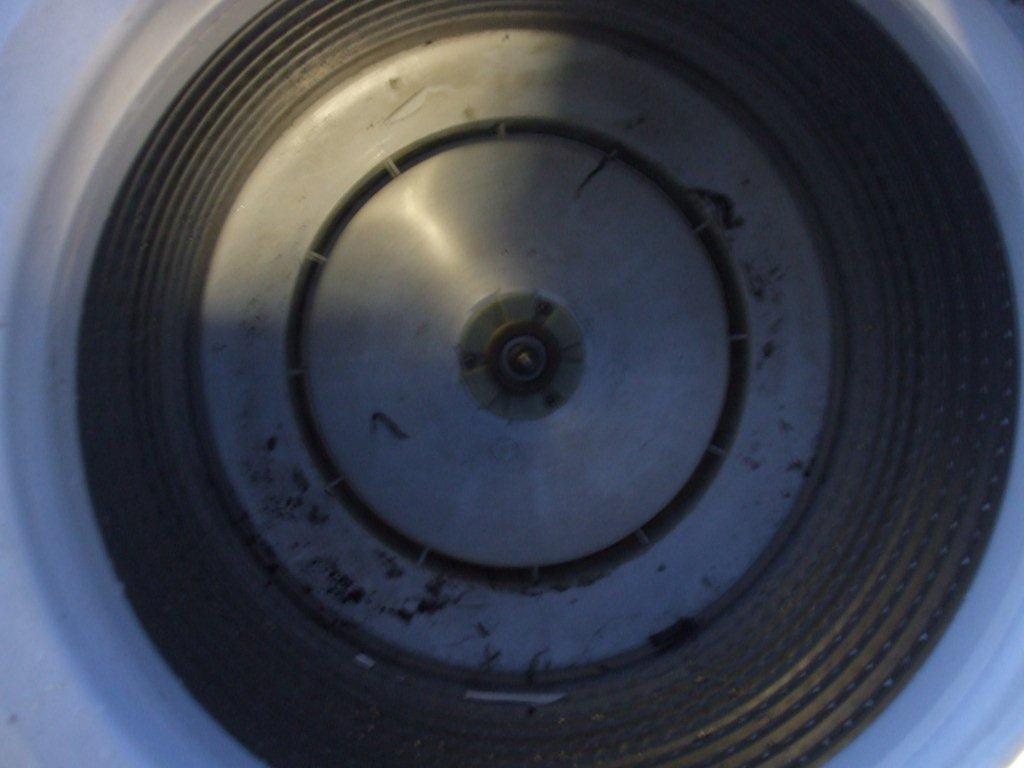
Feeling pretty good now, I have some of the big serious bits for around $100 NZD so this is starting to look feasible, no going back now.

Now for some actual work, I want to strip the washing machines down, remove the motor & see if there is anything else in there that might come in handy as well as the motor bearings & shaft.


So here goes…………stripping the washing machines.

Remove the top including the control panel bit, my ones were actually hanging off but they look like you need to remove 2 screws & then they just unclip. I carefully disconnected the wires & tubes & removed this cover. On one of the washing machines there were 2 wires going to under the lid that needed unscrewing, I think this is a reed switch for the lid sensor. A reed switch is a magnetic switch so once the metal lid closes the switch is activated by the close proximity of the metal, I removed this carefully as it may come in handy for another project I'm working on.

I also removed one screw from the back of the washing machine next to the big hole where the wires & pipes come out, this helps the bowl to be removed.

The bowl is suspended by a plastic hanger bracket in each top corner, remove 2 screws, actually these 2 screws may have held the top on but mine was already off so I’m not sure. Lever the hangers off the corners & they should drop down inside.

Now pull the bowl out from the top, I laid it on its side to do this, it came out surprisingly easy seeing as my washing machines were triangular in shape due to being picked up by a machine with a claw at the scrap yard.

Ok, so I got this big plastic barrel out, leaving just the metal shell left, I may use one of the sides of the metal shell as a tail fin.

I carefully removed all wiring & tubes & pump from the plastic barrel, be careful when removing the crimps from the motor, it would be easier to just cut the wires off but I might want them later so I removed them by gently prising them off with a screw driver.

In the top of the bowl is a long plastic agitator thing, remove the cap & put your arm down the middle & undo the big plastic wing nut thingy. The agitator will come out now leaving 3 more screws to undo.

Very pleased with myself so far although something tells me this is just the easy bit, running out of time now so I’m going to start again tomorrow.

Picture
Picture
Picture
Picture
Picture
Picture
Picture
Picture
Back to Day 2                                                  Forward to Day 4

If you have found my notes on this project helpful then please click the Facebook button above or even the Google + button if you are a member. Thank you.
For more information you can email us or preferably use our new forum page.

Website created and managed by MarksSupplies.com