
The Solar Hot Water Project
|

|

|
|
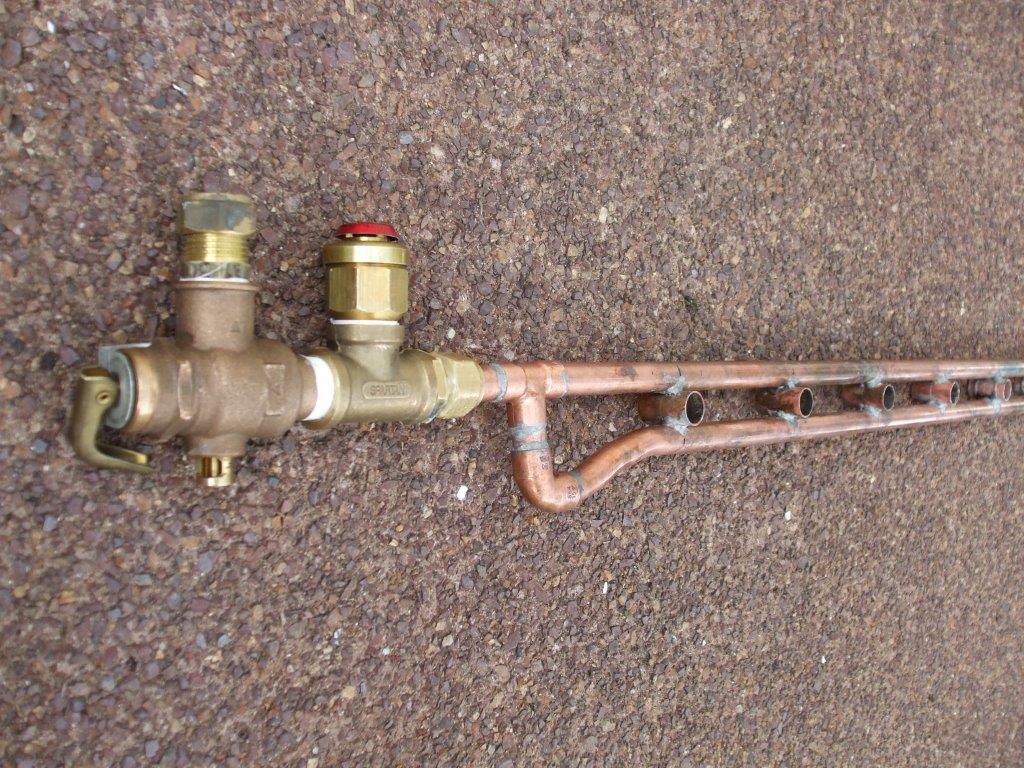
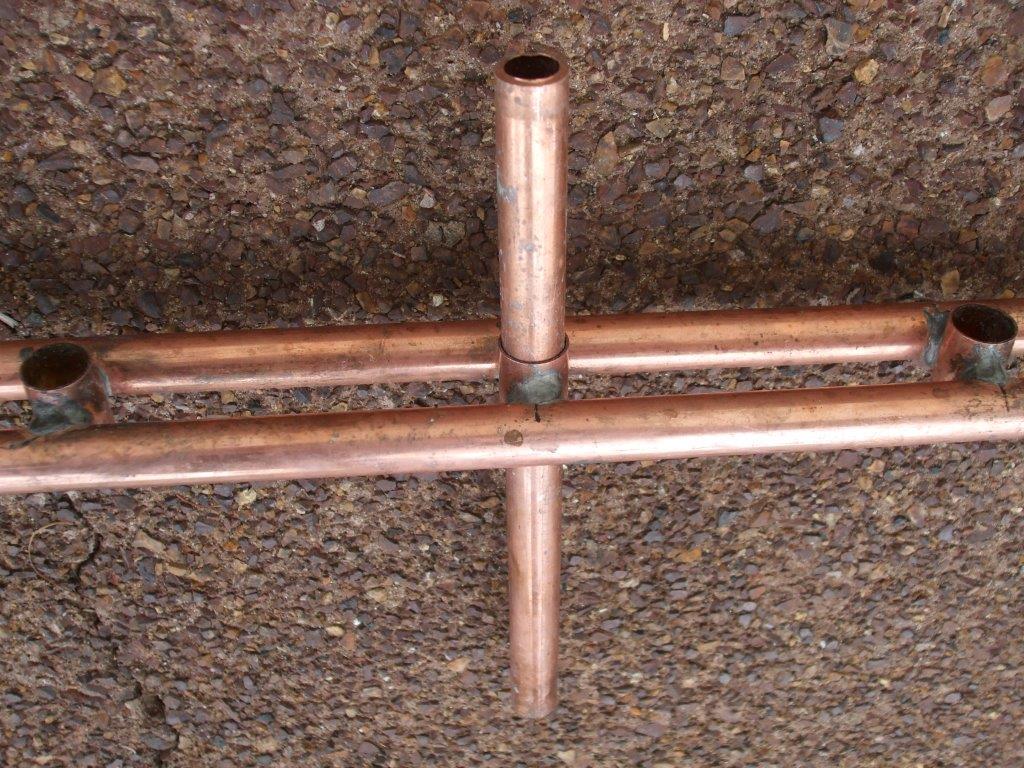
There's not that much I need to mention, the pictures show the details. On the very end is the TPR (Temperature Pressure Relief Valve), and I mounted the air vent next to it.
I enjoyed making this, it took me most of the day but I'm happy with the end result.
I tried to get as much solder around the joins as possible which should help the heat transfer.
I enjoyed making this, it took me most of the day but I'm happy with the end result.
I tried to get as much solder around the joins as possible which should help the heat transfer.
|
|
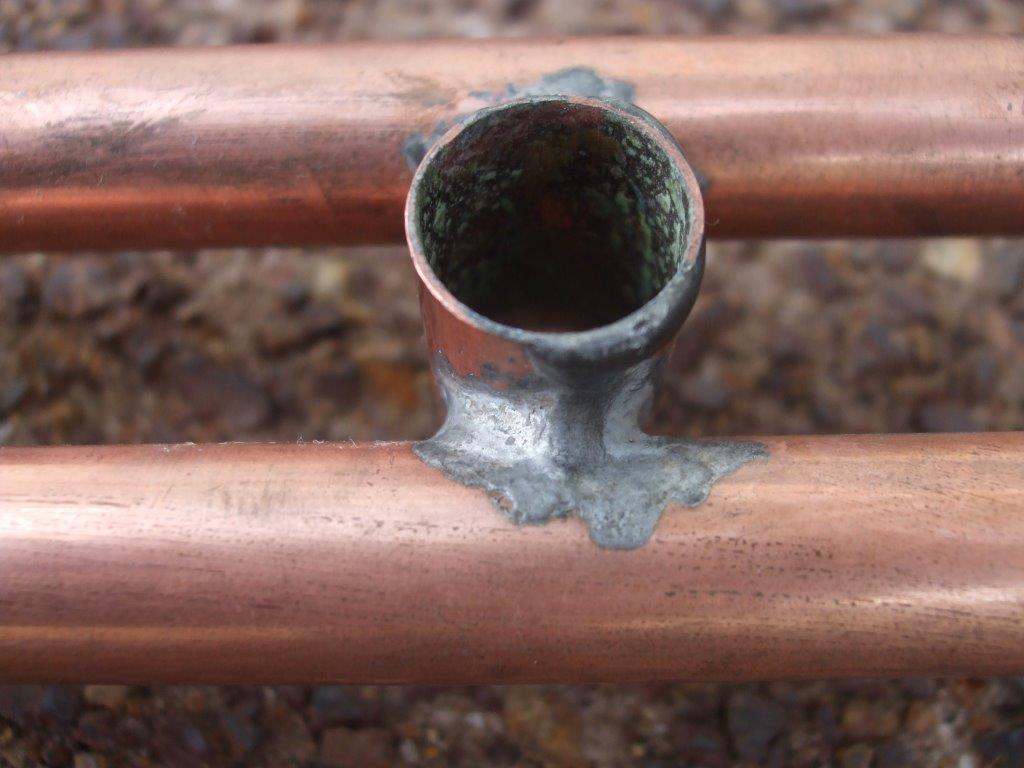
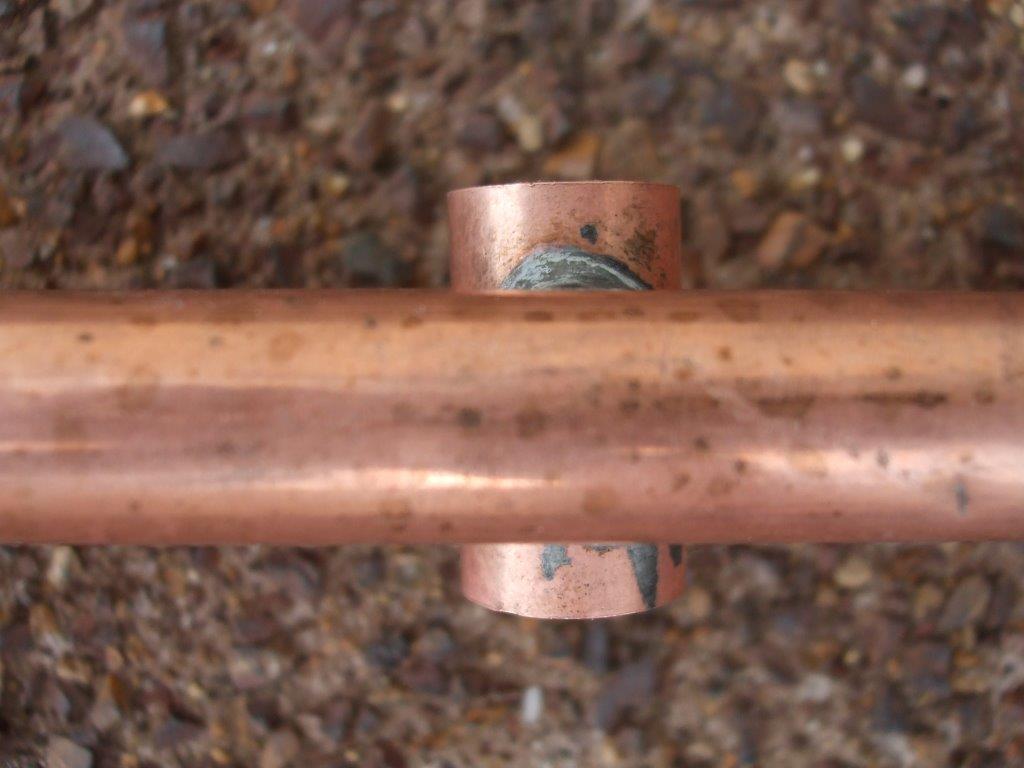
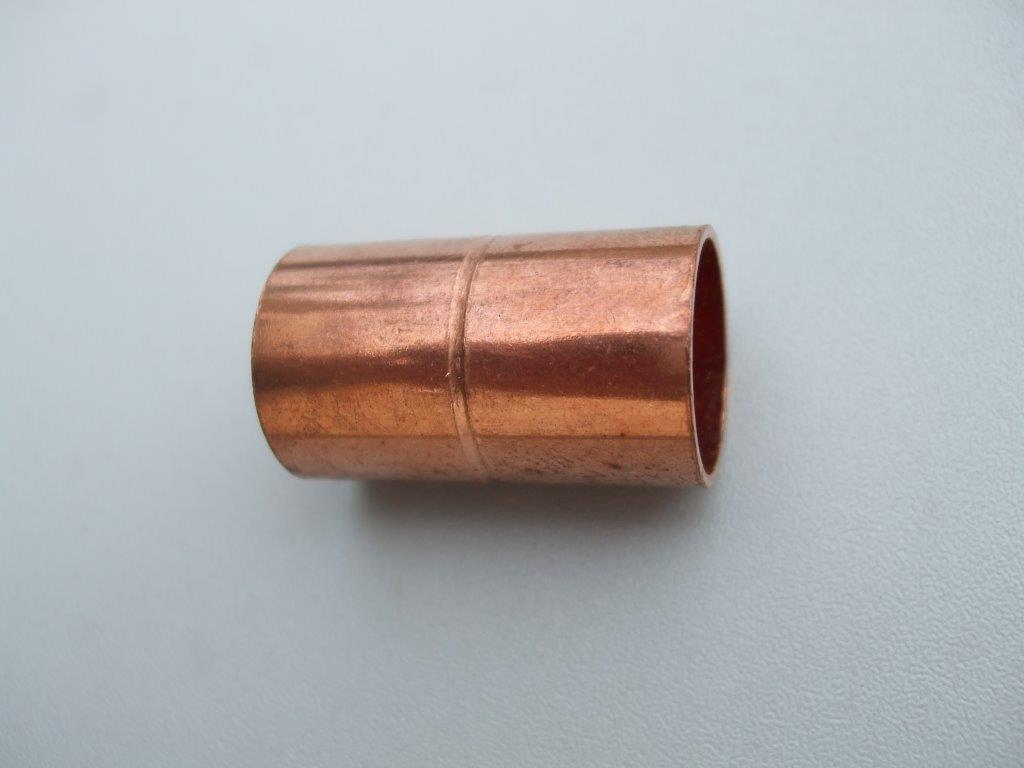
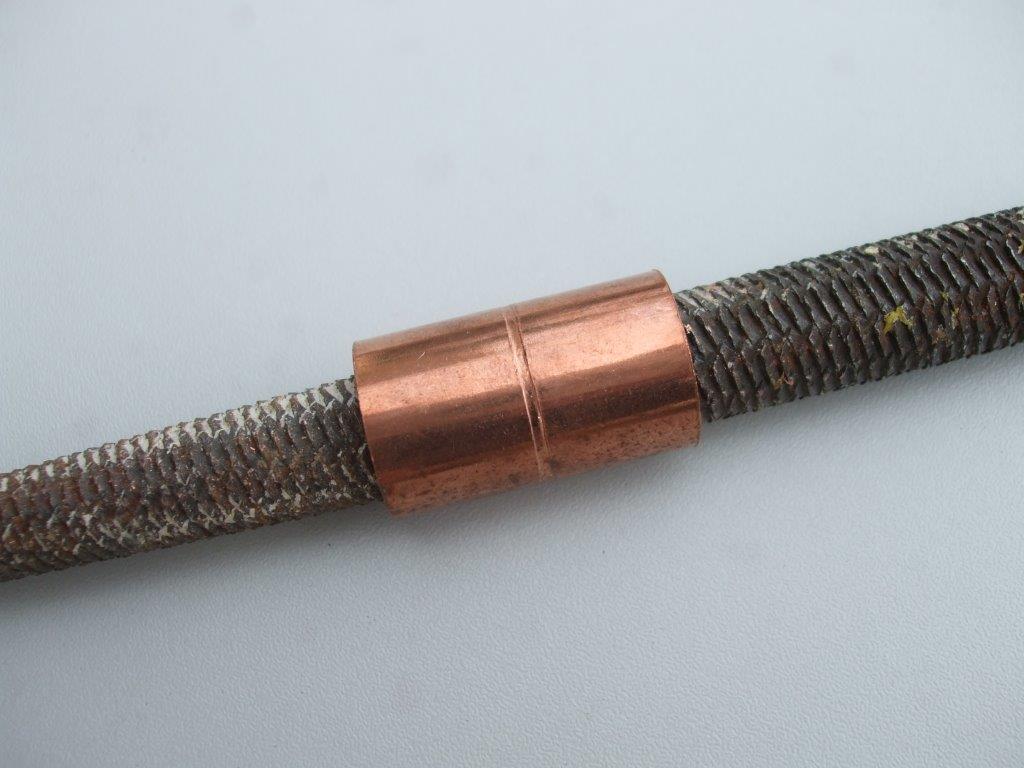
The 2 pictures above are the short lengths of copper that I soldered into the manifold, I will be installing 20 evacuated tubes so I needed 20 of these things. They are designed to join two 15mm copper pipes together, although they are getting increasingly difficult to find because there are other methods of joining copper pipe which I mention towards the bottom of the Day 7 page. The indented line around the middle is made during manufacture, the line is raised inside the fitting which stops a 15mm copper pipe sliding all the way through. This is normally very handy but I had to file this down to allow our heat pipe to slide all the way through. It only takes a few minutes of filing but it needs to be loose enough so that I don't have to force the heat pipes into them. When I eventually install the heat pipes I will use a heat transfer compound inside these copper joiners to help transfer as much heat as possible.
It would seem that this design should work well, it gives the water 2 passes at absorbing the heat which I think it will need. A plumber told me that I could have used 40mm copper pipe & drilled 15mm holes through it & soldered copper pipe into the holes, then the heat pipes would just slide into those 15mm pipes. But my design seemed easier and I didn't have any 40mm pipe or any pipe that a 15mm pipe could fit into. Before I started I considered increasing the size of the 15mm copper to 20mm to slow the flow of water so it could transfer more heat but I think I've made the right decision with sticking to the 15mm design, as long as it is good enough to keep my hot water hot, with 2 passes I think it will be but I guess I'll find out soon.
It would seem that this design should work well, it gives the water 2 passes at absorbing the heat which I think it will need. A plumber told me that I could have used 40mm copper pipe & drilled 15mm holes through it & soldered copper pipe into the holes, then the heat pipes would just slide into those 15mm pipes. But my design seemed easier and I didn't have any 40mm pipe or any pipe that a 15mm pipe could fit into. Before I started I considered increasing the size of the 15mm copper to 20mm to slow the flow of water so it could transfer more heat but I think I've made the right decision with sticking to the 15mm design, as long as it is good enough to keep my hot water hot, with 2 passes I think it will be but I guess I'll find out soon.
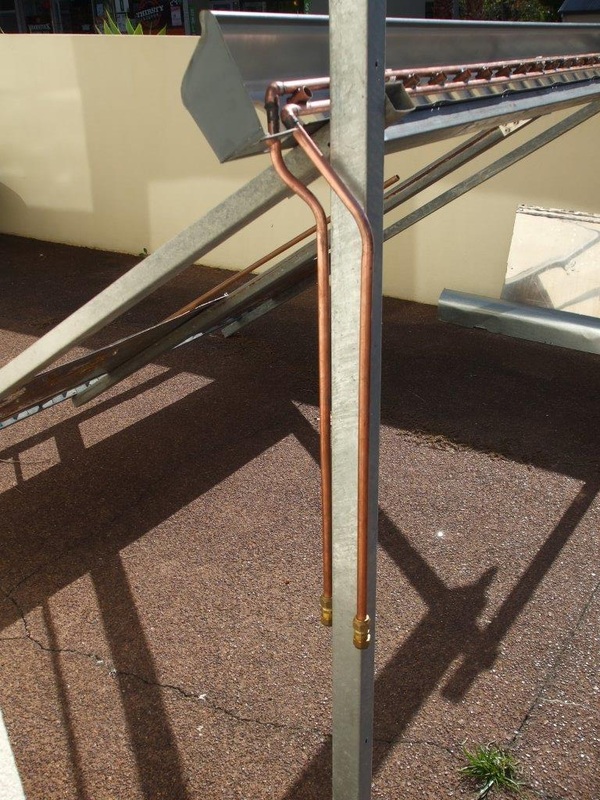
I've extended the pipes so that after a few bends they both come down parallel to the upright leg with a brass connector on each for easy disconnection for maintenance etc. I've kept a gap between the copper pipe & the upright leg to allow for the insulation to be fitted later.
|
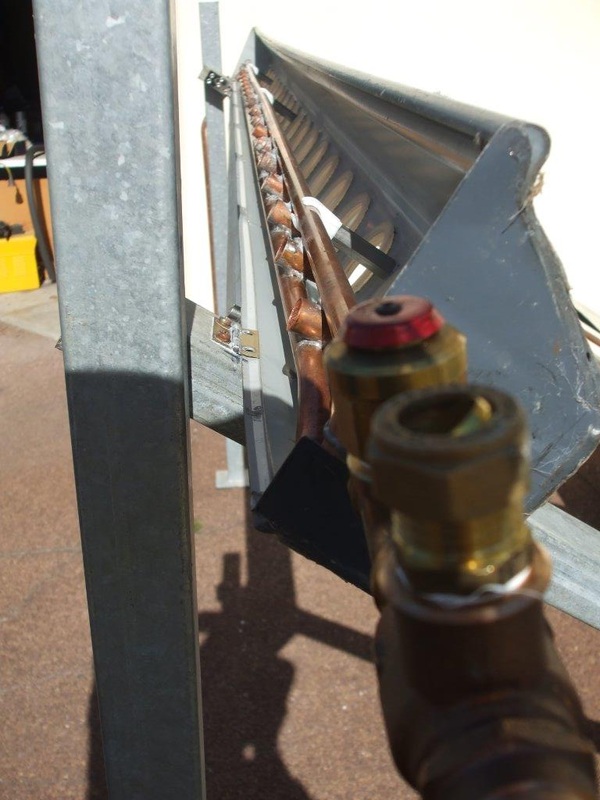
I secured the manifold with three 15mm pipe clips mounted on 45mm long pillars, you can just see all three in the picture. I used the clips so that the manifold can be quickly & easily removed for maintenance & transporting to the roof.
|
If you like our site then please click on the Facebook icon at the top right of this page, thank you.
For more information you can email us via our Contact Us page.