
Self Balancing Scooter Day 5
10th October 2012
3 hours |

|
There's not too much more I want to do to this at this stage until I get the electronics up & running to see if the general design works.
I may have a look at a temporary cover to protect the wiring & electronics from the riders feet plus I need to come up with a proper steering method by adding a potentiometer at the base of the handle bar as well as mounting some springs.
I've wedged the springs in for now & they are under compression instead of tension which has got me thinking of many different designs but keeping this simple is always the best method so I'm probably going to go with 2 springs under tension.
However if it was simple I was after then I should have put 4 wheels on this dam thing.
Spent another 3 hours on this today, & fitted better springs & a button on the handle bar.
|
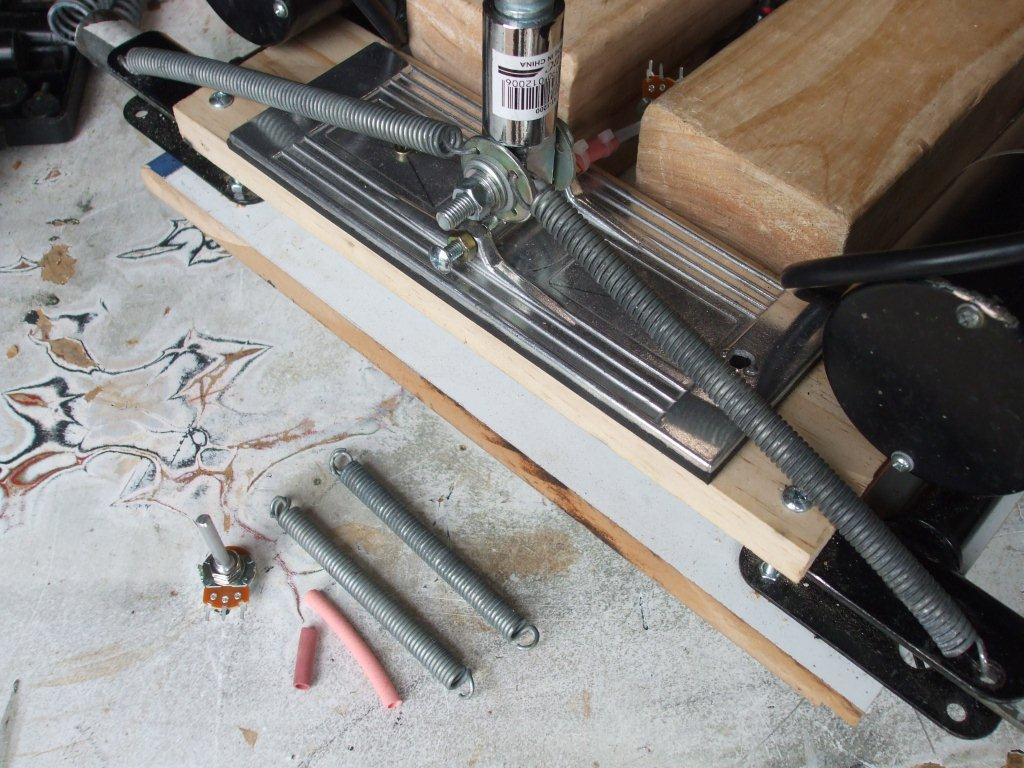
I went to the local metal recyclers & found these 2 springs on the ground, they may have come from an old folding garden chair or folding bed but I can't be sure. I picked up 2 short ones & 2 long ones but it was the longer ones that I decided were best because they would reach the holes that are already in the frame.
Also at the bottom of the photo is a 5K pot for steering & some rubber sleeving. More on this in the next photo. |
|
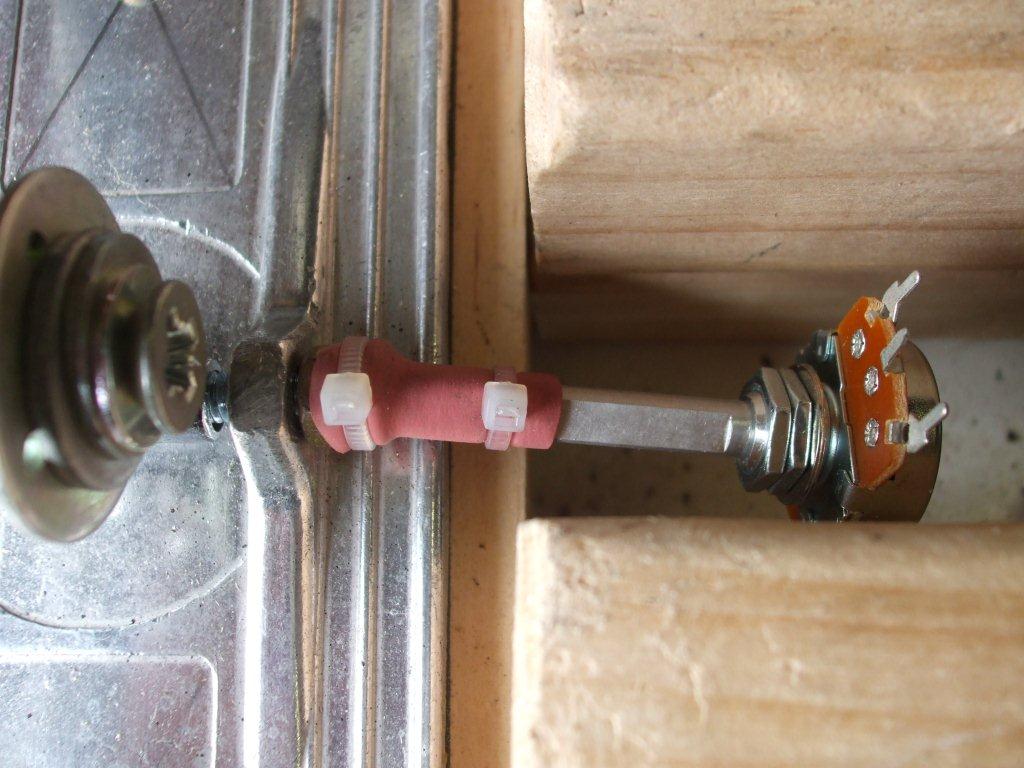
I used the rubber sleeving as a flexible coupling between the pot & the steering bolt. I put a cable tie at each end to stop it slipping.
The pot will eventually be mounted inside a box with just the shaft poking out through a hole in the box. But I want to put all the electronics in the same box & until the electronics arrive I don't know what size box to use so it just dangles there for now. The pot is a standard linear 5K PCB mountable pot with a 24mm shaft. When buying this pot make sure it comes with a fixing nut & washer. |
|
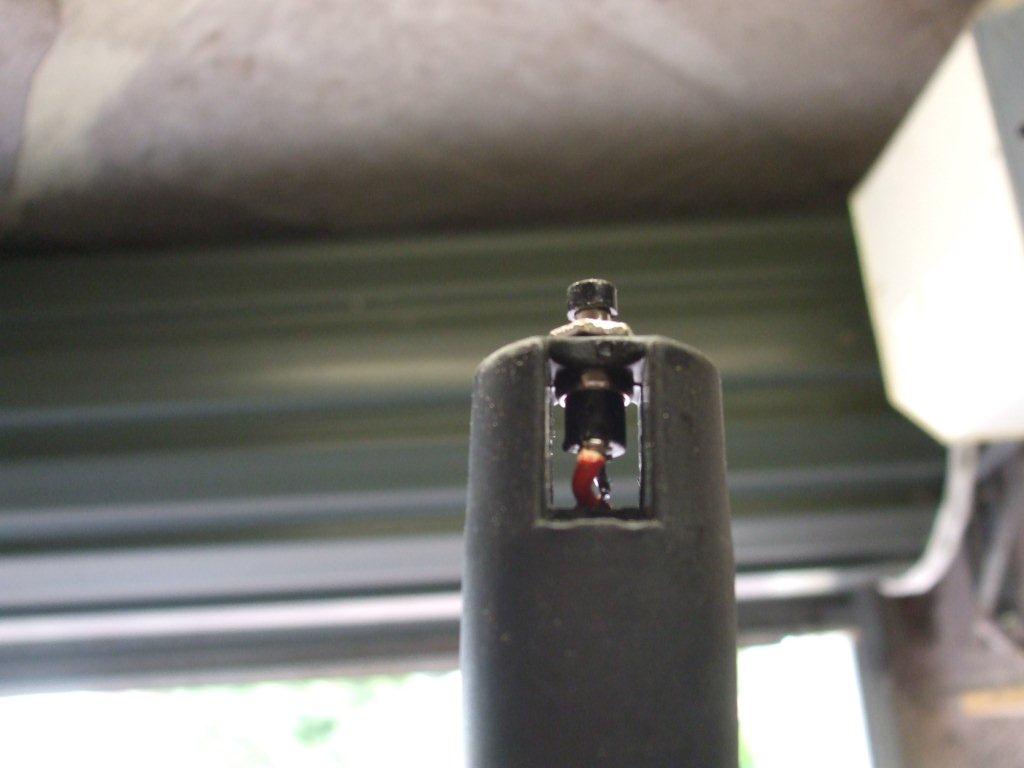
I mounted a switch at the top of the handle & fed the 2 wires down inside the handle & out the bottom.
I suppose the correct term for this switch would be a dead mans switch but that sounds a bit morbid especially as I'm going to be the rider. So I'm going to call this the safety switch. It's a normally open contact switch & momentarily on when pushed. The idea is to keep this held down at all times for normal running & if you let go of the switch the scooter will stop. These switches are very cheap, a few dollars in any currency, they are referred to as mom on switches. Make sure when you buy it that it comes with a nut & washer. |
|
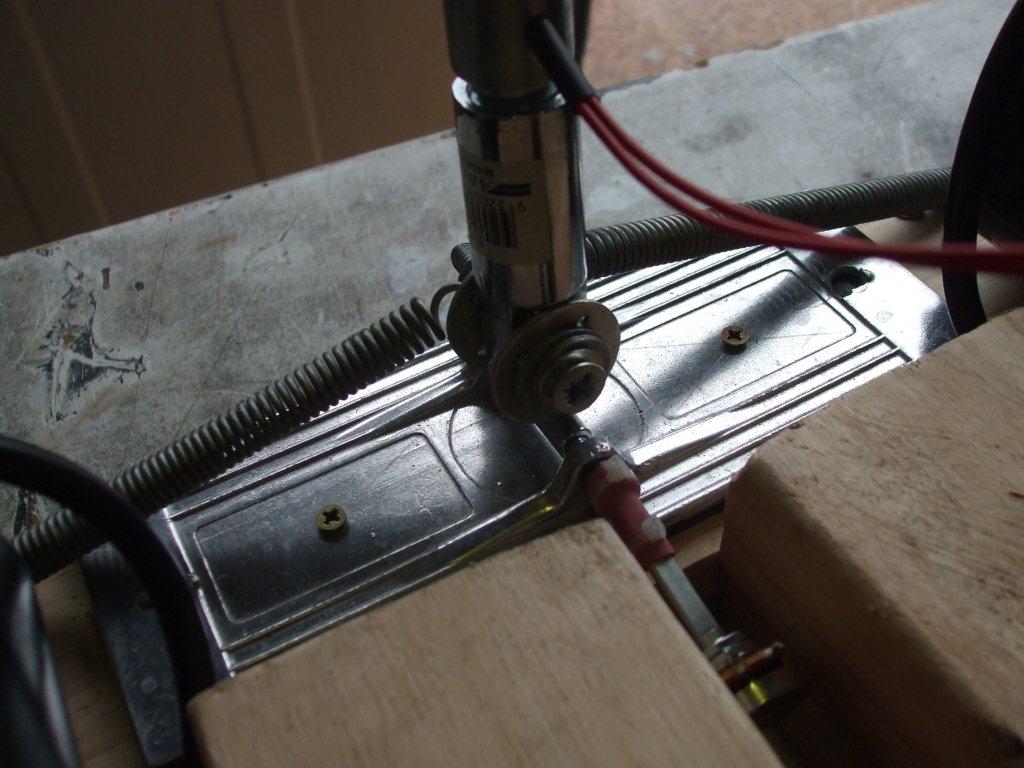
This shows the 2 wires exiting the bottom of the handle bar.
I put a piece of heat shrink over the wires to protect them where they go through the hole. It would be good to still be able to unscrew this handle for storage or to help get it in a vehicle. So I will have to put a plug & socket on the end of these 2 wires. |
If you like our site then please click on the Facebook icon at the top right of this page, thank you.
For more information you can email us via our Contact Us page.